This article is a step-by-step HOWTO to set up Oracle 12c Enterprise on Oracle Unbreakable Linux 6.4, on an Automatic Storage Management (ASM) partition, on a Linux libvirt host (through QEMU with KVM).
The text is an adaptation of an awesome tutorial by lab128.
System Requirements
- 8 GB of RAM;
- 100 GB of free space on the hard disk;
- libvirt,
virshandvirt-manager. This guide was tested on Ubuntu 14.04 LTS with latest updates
Download Oracle Software
- Oracle Linux: once in the Oracle Cloud service, select “Oracle Linux” and “x86 64-bit”. Then click on release (6.4.0.0.0) and download Oracle Linux Release 6 Update 4 for x86_64 (64 Bit) – V37084-01
- Oracle Database 12c Release 1 Grid Infrastructure (12.1.0.2.0) for Linux x86-64 (use Linux x86-64, then “See All” link)
Virtual Machine Setup
First of all you need a bridge on your libvirt host to a subnet that has access to the Internet. You can follow steps in this guide to set up one in Ubuntu, we will assume the interface name is br0.
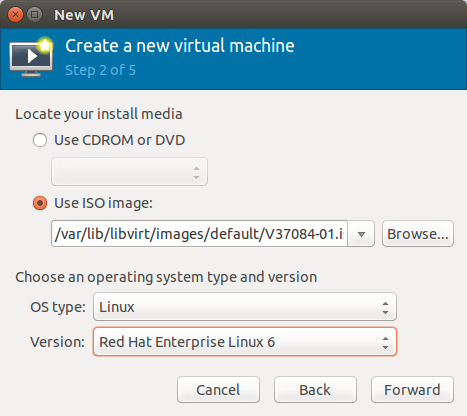
Start virt-manager, right-click on the connection name, select “New”. Then follow these screenshots to set up the virtual machine:
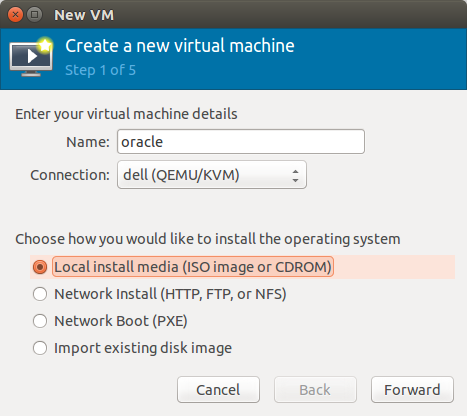
Point the install media ISO to the file you downloaded earlier:
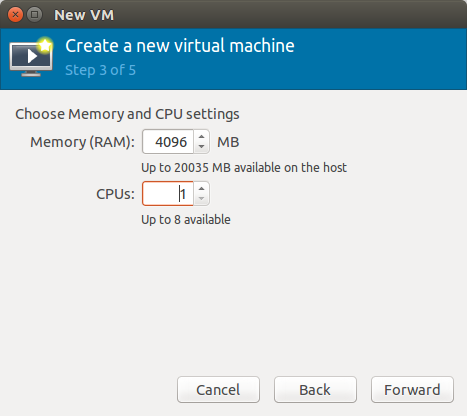
Make sure to select “Select managed or other existing storage” on the next form:
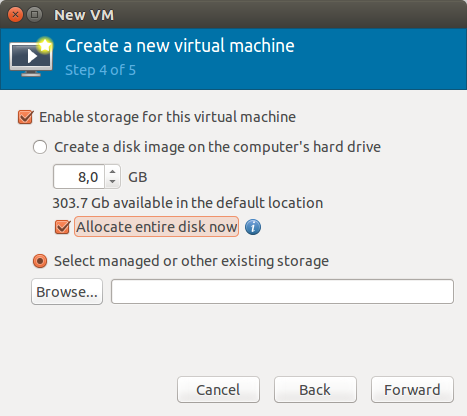
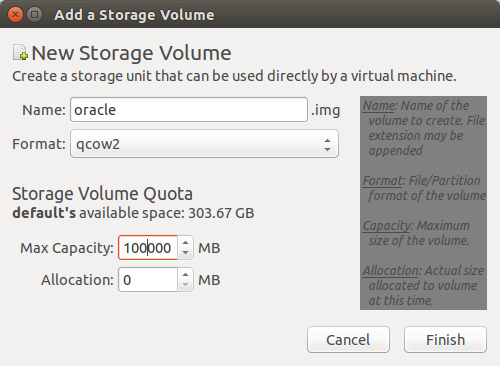
We will use a custom qcow2 file for the main disk image, so click on “Browse” and then “New Volume”:
Make sure you have a bridge device pre-configured (in this example br0) so that hosts that need to access this database will be able to do so:
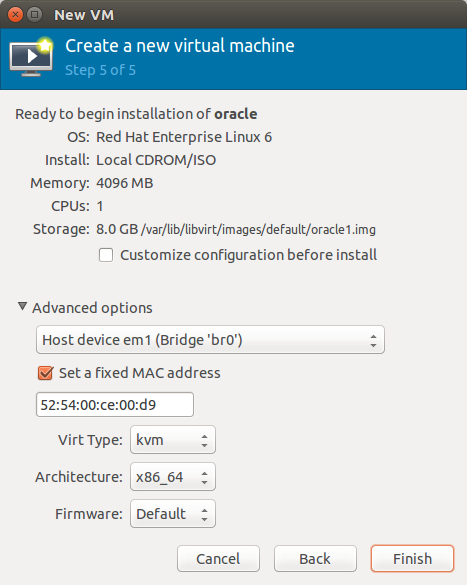
Clicking on “Finish” will save the newly created VM.
Guest Operating System Installation
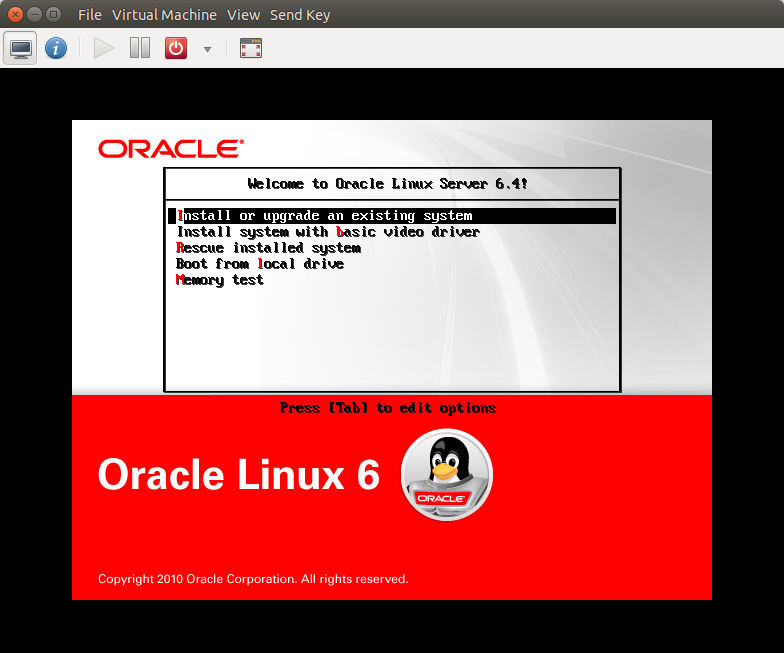
Start the virtual machine by clicking the “Start” button on the toolbar. The resulting console window will contain the Oracle Linux boot screen. Proceed with the “Install or upgrade an existing system”:
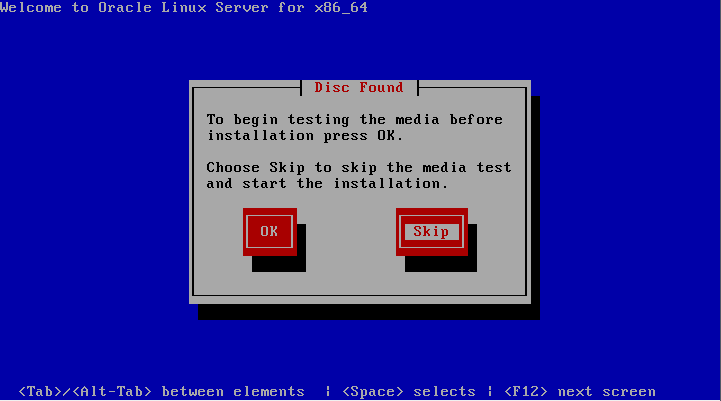
Do not perform the media test. Choose the “Skip” button:
Continue through the Oracle Linux installation as you would for a normal server. On next three screens select Language, Keyboard, and Basic Storage Devices type. Confirm to discard any data.
Note: during installation virt-manager will be keeping the mouse pointer inside VM area. To exit, press the Left Alt and Right Alt keys at the same time.
Note: in this article we used the fake domain name “moio”. You can change it, but keep in mind to make same change throughout this exercise.
Set “Hostname” to oracle.moio. You can then and press the “Configure Network” button if your LAN does not use DHCP.
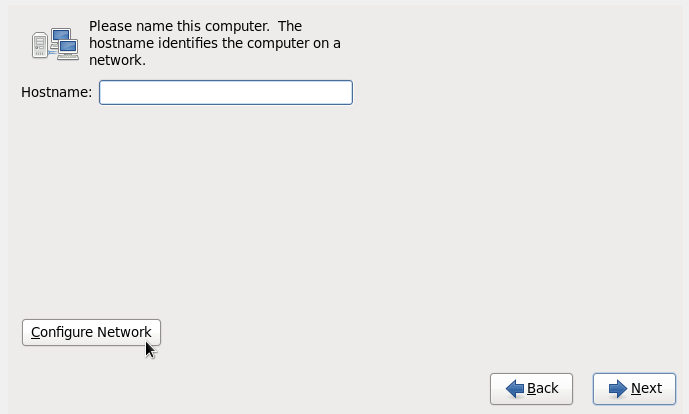
Close Network Connections screen and proceed to next setup screen. Select the time zone, then type in the Root Password: oracle.
Select “Use All Space” type of installation and check “Review and modify partitioning layout”:
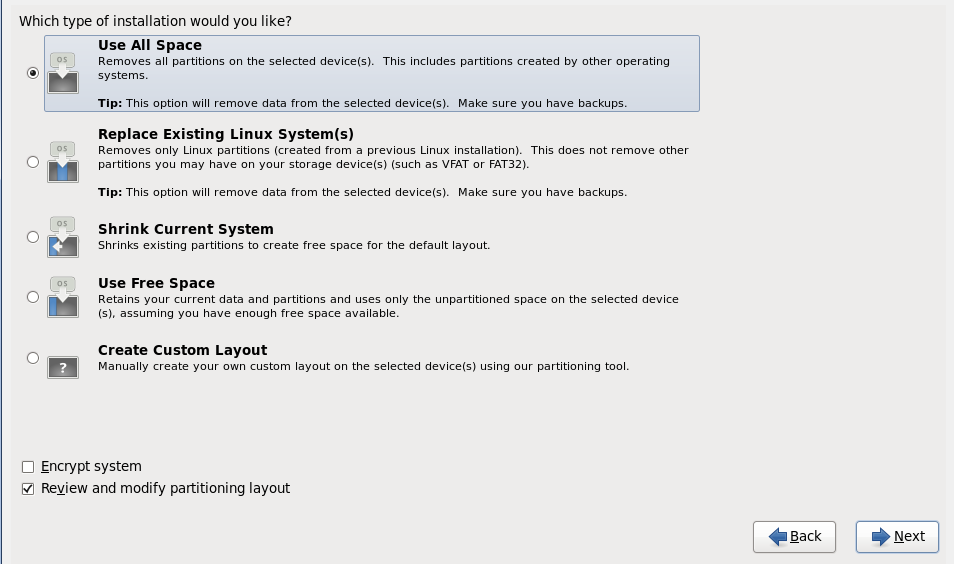
Edit size of lv_swap device to 1700 MB; then edit size of lv_root to the maximum possible size. Press “Next”:
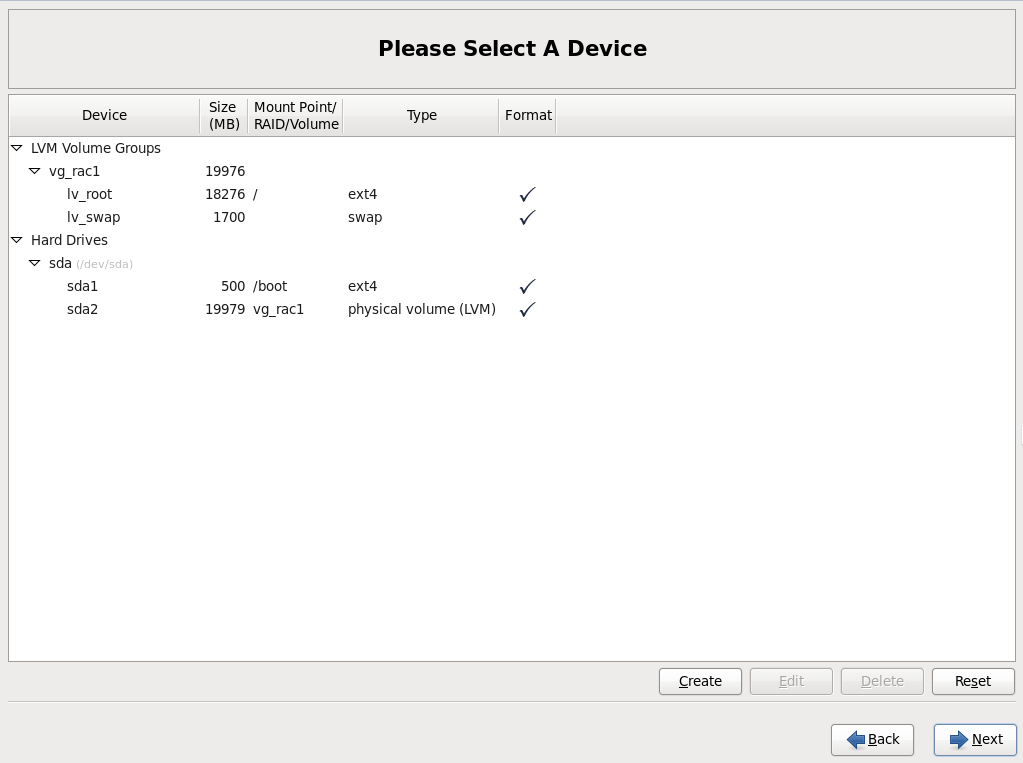
Confirm through warnings and create partitions. Keep defaults in Boot loader screen.
In the software type installation screen select “Database Server” and check “Customize now” button. Then press “Next”:
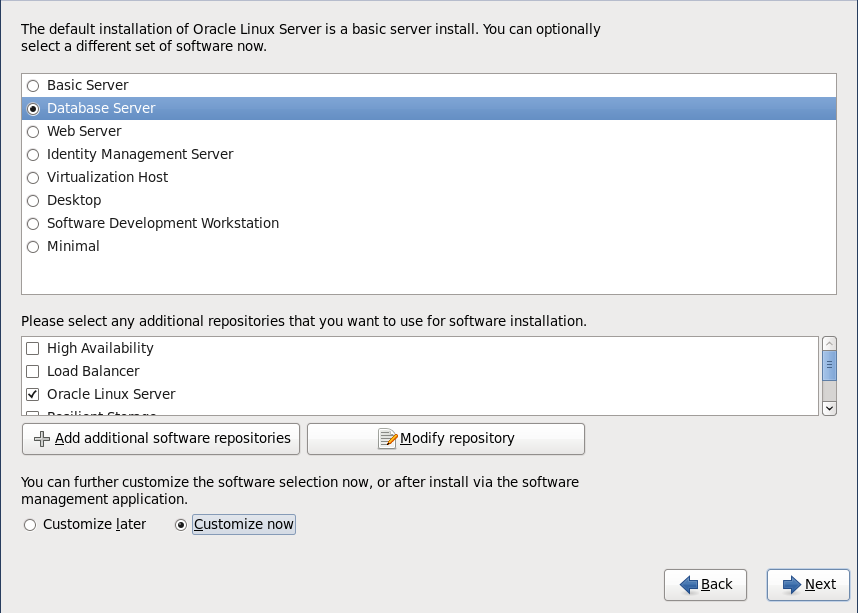
In the Customization screen select “Databases” and uncheck all items; select “Desktops” and check “Desktop” and “Graphical Administration Tools”; then press “Next” and finish the installation, including rebooting.
When the virtual machine is back there will be more obvious setup forms. Don’t create an oracle user account for now (it will be created in the following paragraph). You can skip Kdump settings.
Check Internet Access
We will need Internet access because additional packages will be installed. You can check if it’s working correctly via SSH:
ssh root@oracle.moio
oracle@oracle.moio's password:
Last login: Mon Jun 20 11:32:31 2016 from lenovo.moio
[root@oracle ~]# ping yahoo.com
PING yahoo.com (206.190.36.45) 56(84) bytes of data.
64 bytes from ir1.fp.vip.gq1.yahoo.com (206.190.36.45): icmp_seq=1 ttl=51 time=197 ms
64 bytes from ir1.fp.vip.gq1.yahoo.com (206.190.36.45): icmp_seq=2 ttl=51 time=194 ms
^C
--- yahoo.com ping statistics ---
2 packets transmitted, 2 received, 0% packet loss, time 1641ms
rtt min/avg/max/mdev = 194.214/195.886/197.559/1.730 ms
If ping doesn’t work, troubleshoot the problem using ifconfig and making changes in Network Connections (Linux desktop Main menu | System | Preferences | Network Connections).
Oracle Grid Infrastructure Installation Prerequisites
In order to use ASM, an Oracle Grid Infrastructure installation must be performed first (this software was formerly known as “Clusterware”). Before that we will handle a few prerequisites in this section. All of the following commands must be performed by the root user.
Install the oracle-rdbms-server-12cR1-preinstall package. This package performs prerequisites including kernel parameter change and creation of Linux oracle account:
# yum install oracle-rdbms-server-12cR1-preinstall
Then install ASMLib:
# yum install oracleasm
# yum install oracleasm-support
Configure ASMLib with:
# oracleasm configure -i
Configuring the Oracle ASM library driver.
>
This will configure the on-boot properties of the Oracle ASM library
driver.  The following questions will determine whether the driver is
loaded on boot and what permissions it will have.  The current values
will be shown in brackets ('[]').  Hitting <ENTERwithout typing an
answer will keep that current value.  Ctrl-C will abort.
>
Default user to own the driver interface []: oracle
Default group to own the driver interface []: oinstall
Start Oracle ASM library driver on boot (y/n) [n]: y
Scan for Oracle ASM disks on boot (y/n) [y]:
Writing Oracle ASM library driver configuration: done
#
Create the directory in which the Oracle software will be installed:
# mkdir -p /u01/app/12.1.0/grid_1
# mkdir -p /u01/app/oracle
# chown -R oracle:oinstall /u01
# chown oracle:oinstall /u01/app/oracle
# chmod -R 775 /u01/
Add the oracle account to the dba group:
# usermod -G dba oracle
Reset the oracle user password to oracle:
# passwd oracle
Changing password for user oracle.
New password:
BAD PASSWORD: it is based on a dictionary word
BAD PASSWORD: is too simple
Retype new password:
passwd: all authentication tokens updated successfully.
#
Disable SELinux by editing the /etc/selinux/config file, making sure the SELINUX flag is set as follows:
SELINUX=disabled
Either configure NTP properly or make sure it is not configured so the Oracle Cluster Time Synchronization Service (ctssd) does not fail. In this case we will deconfigure NTP for simplicity.
# service ntpd stop
Shutting down ntpd:                                        [FAILED]
# chkconfig ntpd off
# mv /etc/ntp.conf /etc/ntp.conf.orig
# rm /var/run/ntpd.pid
Clean up yum repositories:
# yum clean all
At this point, Oracle installation files must be copied into the Virtual Machine. It is assumed that you already downloaded and uncompressed them into an oracle_sw directory, respectively in a grid and a database subdirectory. You could then use rsync via SSH from the host with downloaded files:
$ rsync -av0 oracle_sw oracle@oracle.moio://home/oracle`
There is one package cvuqdisk that should be installed before the installation. Install it from the Oracle grid/rpm directory as root user:
$ su root
Password:
# cd /media/sf_oracle_sw/grid/rpm
# CVUQDISK_GRP=oinstall; export CVUQDISK_GRP
# rpm -Uvh cvuqdisk*
ASM disk setup
We are now going to add a separate virtual disk and partition exclusively for ASM. We will use a separate libvirt image file which has a fixed size, as dynamically expanding qcow2 files are currently not handled correctly.
To create such an image file, please run the following command on the virtualization host:
$ qemu-img create -f raw oracle-asm.img 50G
You can then attach it to the Virtual Machine either via the virt-manager GUI or by using:
$ virsh shutdown oracle # wait until the virtual machine is actually off
$ virsh attach-disk oracle oracle-asm.img vdb --driver qemu --subdriver raw --config
$ virsh start oracle
Then you can format the disk with the following commands via SSH, root user.
First, check that current disks can be seen by the Virtual Machine:
# ls /dev/vd*
/dev/vda  /dev/vda1  /dev/vda2  /dev/vdb
#
Second, use the fdisk command to partition the new disk vdb.
# fdisk /dev/vdb
Device contains neither a valid DOS partition table, nor Sun, SGI or OSF disklabel
Building a new DOS disklabel with disk identifier 0xd724aa83.
Changes will remain in memory only, until you decide to write them.
After that, of course, the previous content won't be recoverable.
Warning: invalid flag 0x0000 of partition table 4 will be corrected by w(rite)
WARNING: DOS-compatible mode is deprecated. It's strongly recommended to
       switch off the mode (command 'c') and change display units to
       sectors (command 'u').
Command (m for help): n
Command action
 e   extended
 p   primary partition (1-4)
p
Partition number (1-4): 1
First cylinder (1-391, default 1):
Using default value 1
Last cylinder, +cylinders or +size{K,M,G} (1-391, default 391):
Using default value 391
Command (m for help): w
The partition table has been altered!
Calling ioctl() to re-read partition table.
Syncing disks.
#
The sequence of answers is “n”, “p”, “1”, “Return”, “Return” and “w”.
Third, check that the partitioning was actually correct by repeating the previous ls command:
# ls /dev/vd*
/dev/vda  /dev/vda1  /dev/vda2  /dev/vdb  /dev/vdb1
#
Fourth, mark the new disk in the ASMLib as follows:
# oracleasm createdisk DISK1 /dev/vdb1
Writing disk header: done
Instantiating disk: done
#
Fifth, run the scandisks command to refresh the ASMLib disk configuration.
# oracleasm scandisks
Reloading disk partitions: done
Cleaning any stale ASM disks...
Scanning system for ASM disks...
#
Finally, check that the disk is now visible to ASM using the listdisks command.
# oracleasm listdisks
DISK1
#
From this point on, you can save and restore the Virtual Machine state as described by the following sections: “Saving Virtual Machine Snapshots” and “Restoring Virtual Machine Snapshots”.
Oracle Grid Infrastructure installation
Login to the Virtual Machine as oracle user (better to avoid using su - command, problems were reported) and start the Oracle installer.
$ ssh -X oracle@oracle.moio
$ cd oracle_sw/grid
$ ./runInstaller
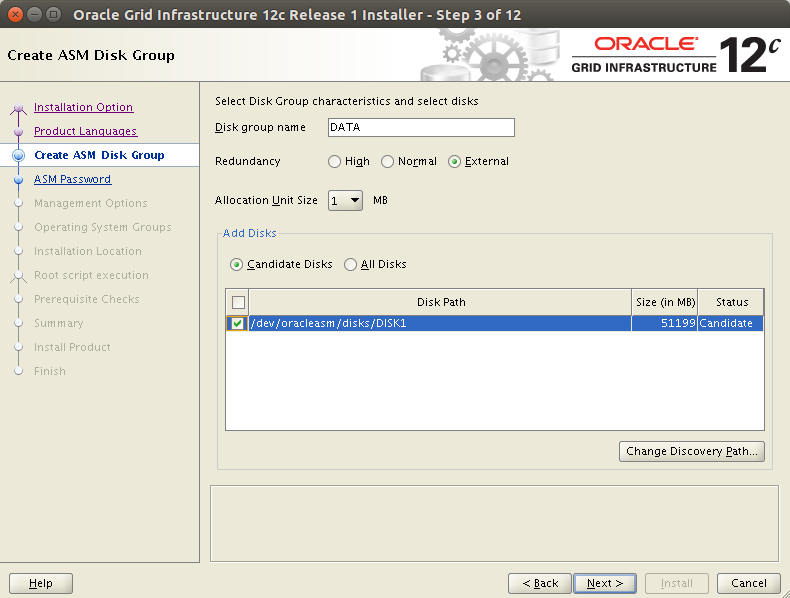
Then follow these screenshots to guide you through the installer:
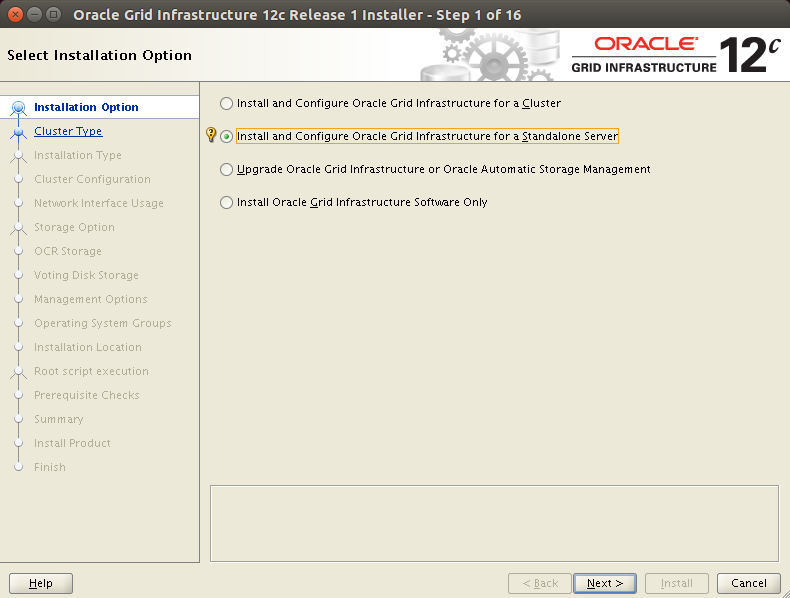
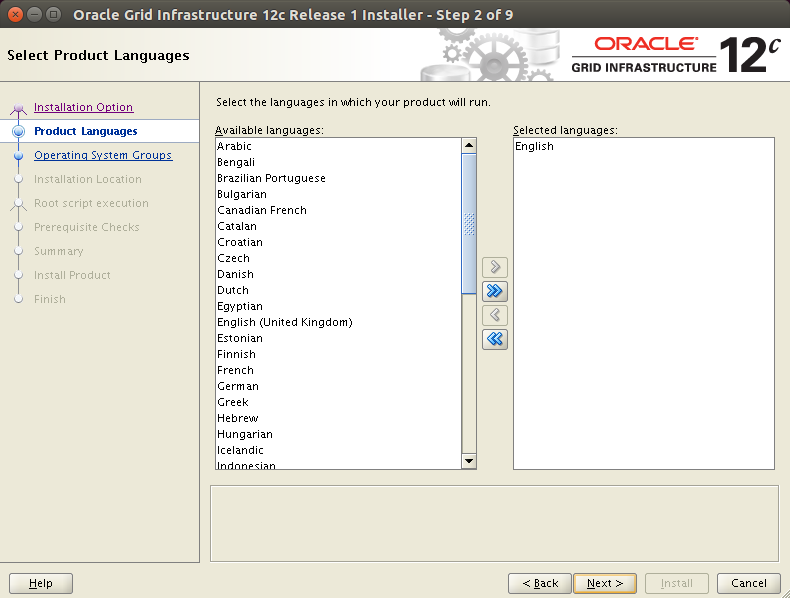
On the disk selection screen click on “Change Discovery Path” button, then enter /dev/oracleasm/disks. After that DISK1 should appear as a possible option:
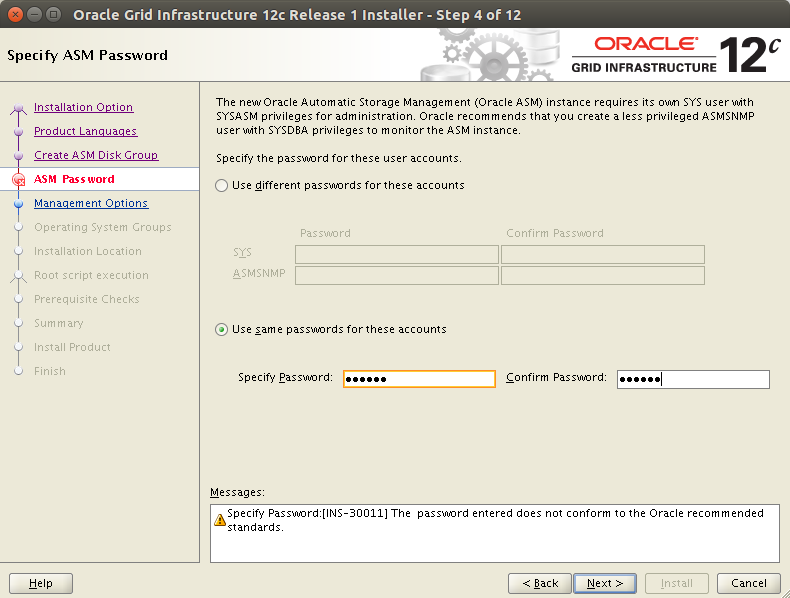
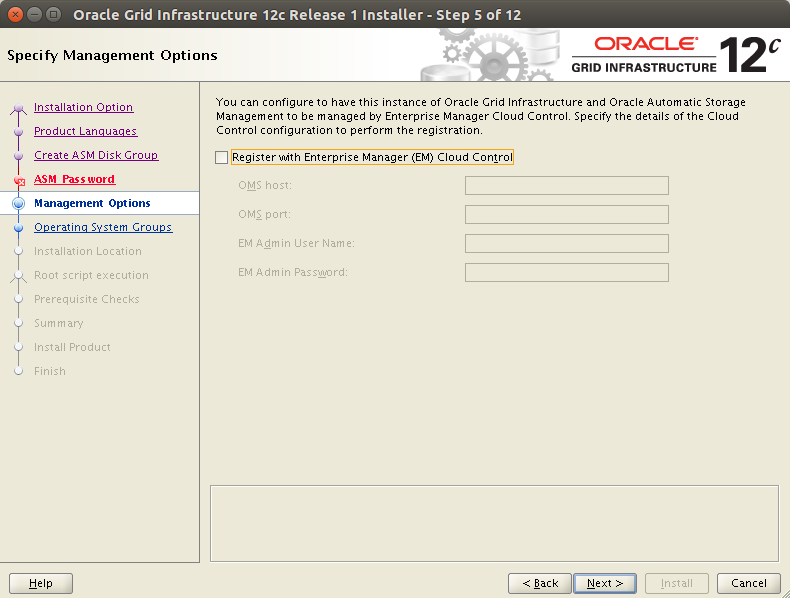
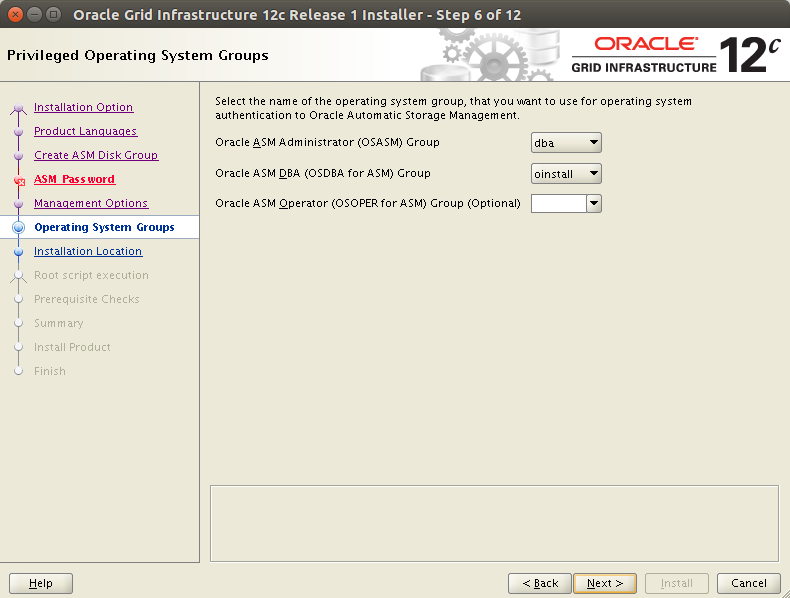
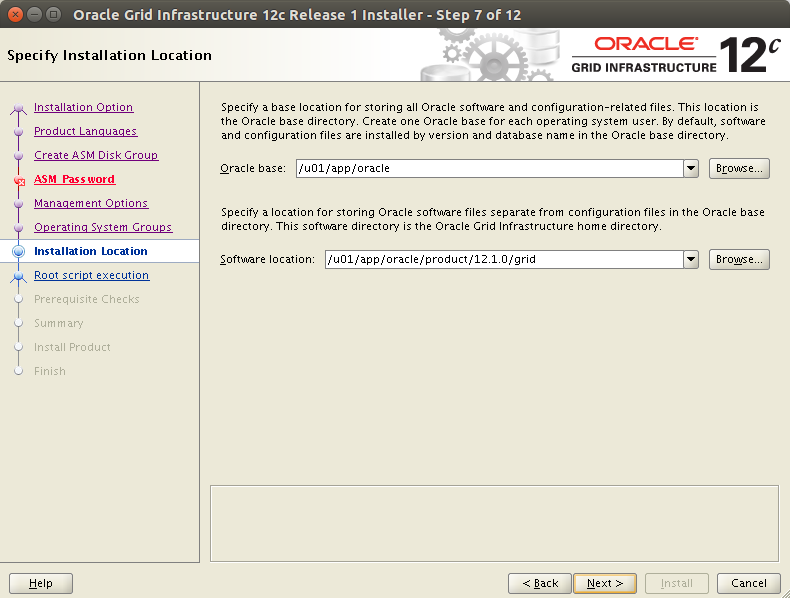
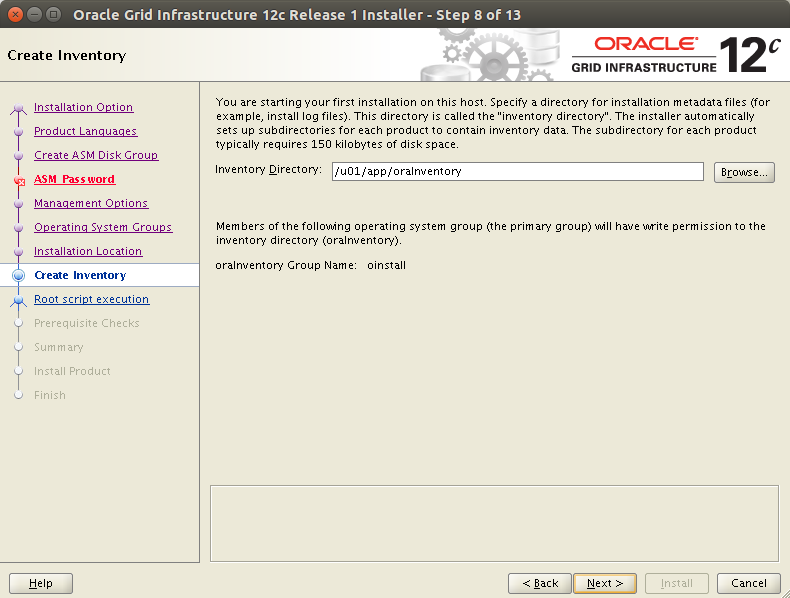
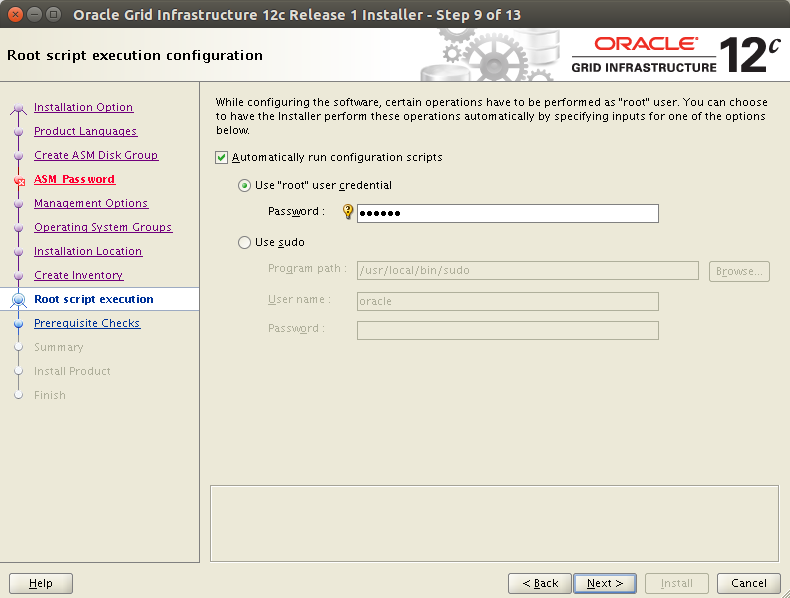
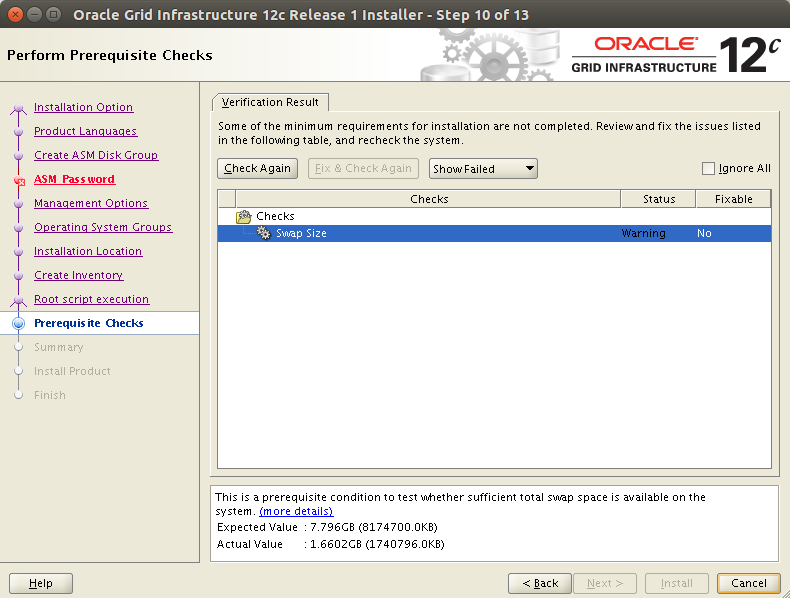
Checks will be run and a swap file warning might appear. Ignore it and continue the installation:
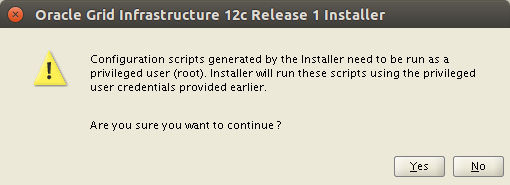
At some point the following pop up will appear, just click “Yes” and follow instructions to run the installation scripts:
At the end of the procedure the Oracle Grid Infrastructure should be correctly installed.
Oracle Database installation
Login to the Virtual Machine as oracle user (better to avoid using su - command, problems were reported) and start the Oracle installer.
$ ssh -X oracle@oracle.moio
$ cd oracle_sw/database
$ ./runInstaller
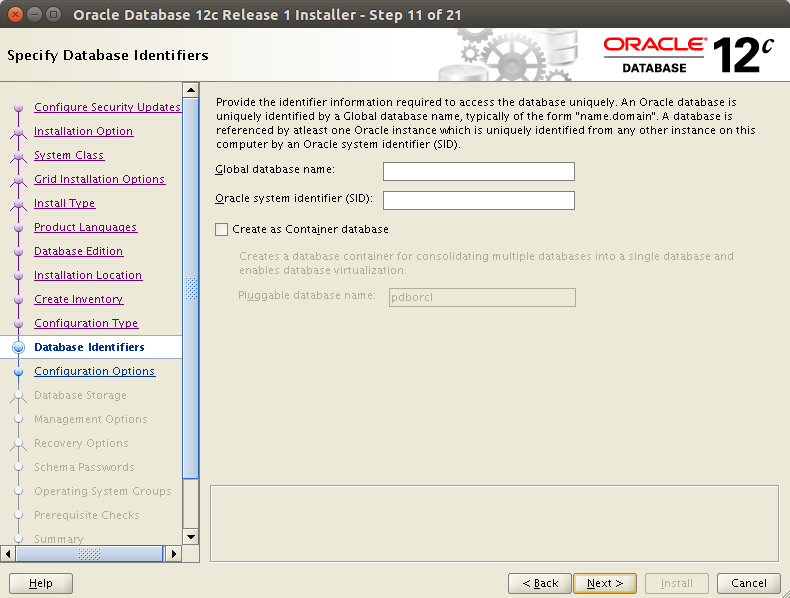
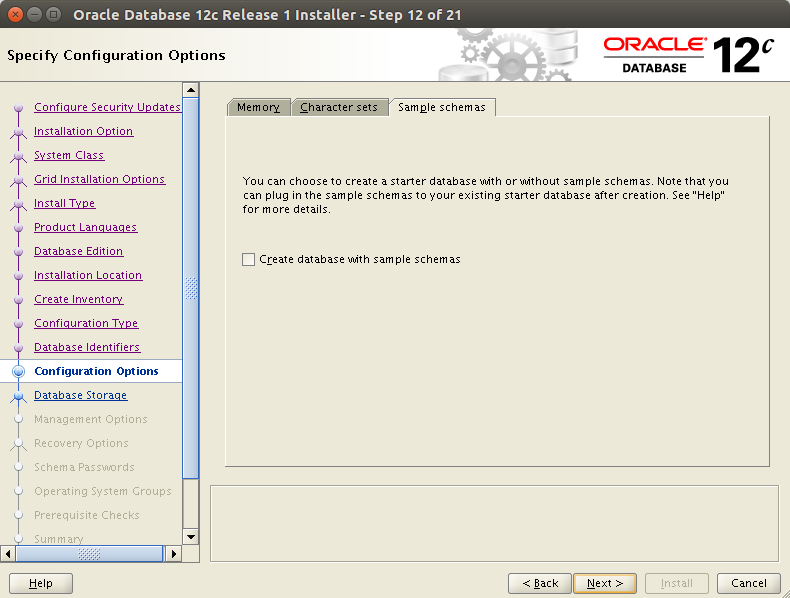
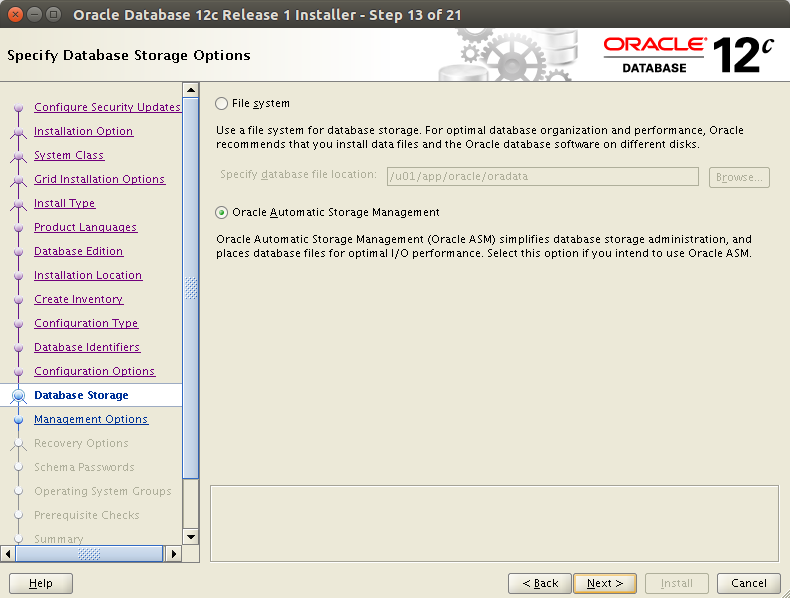
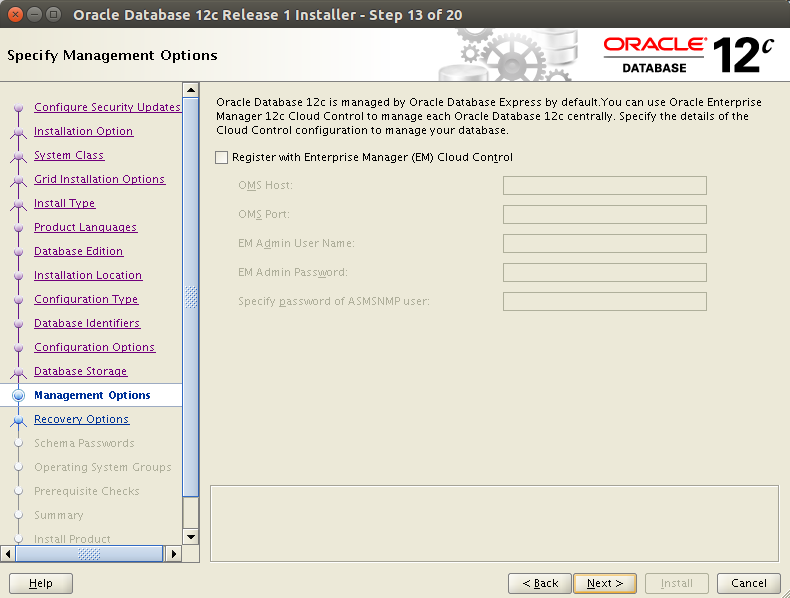
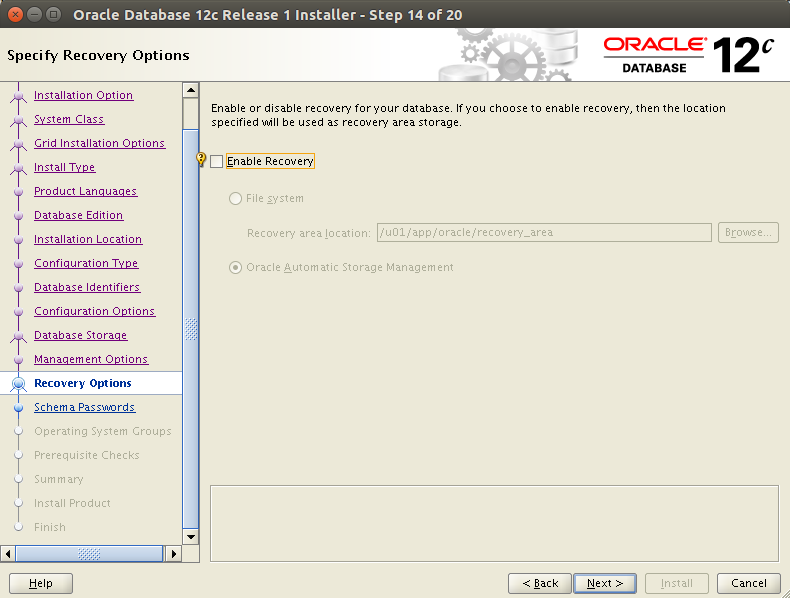
Then follow these screenshots to guide you through the installer:
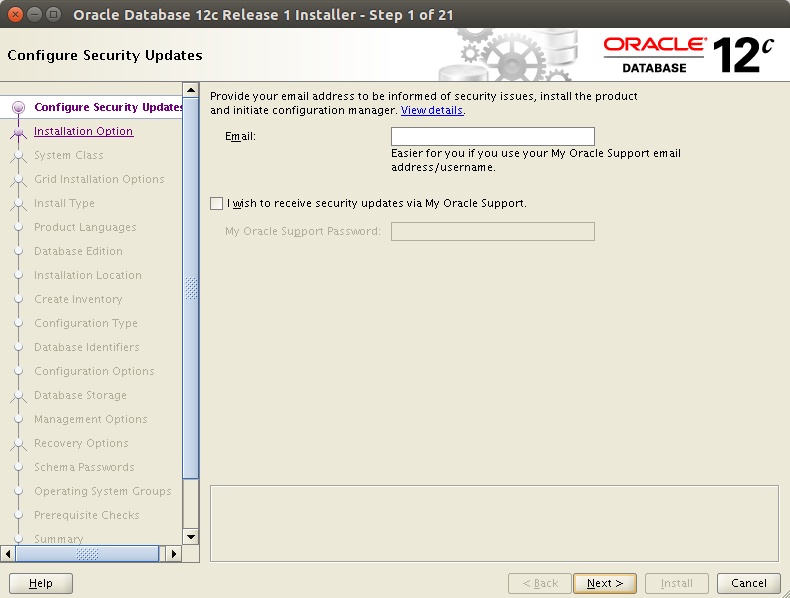
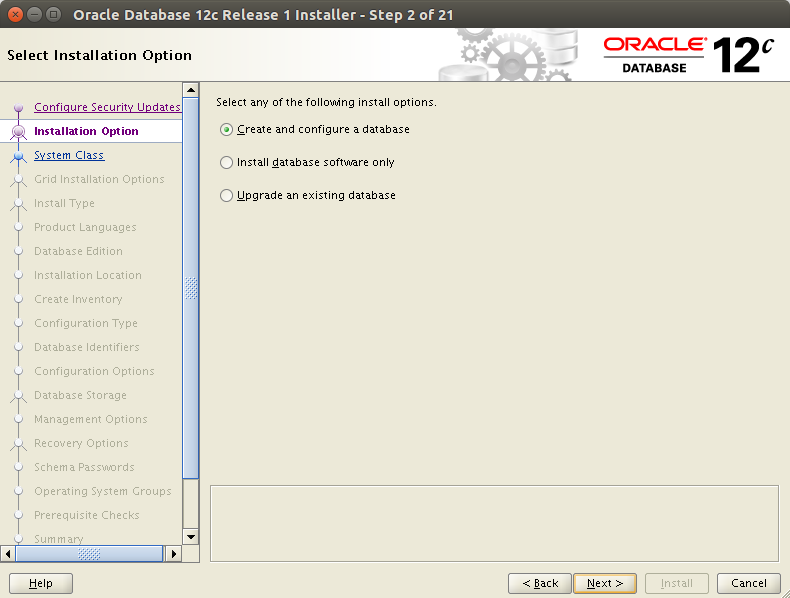
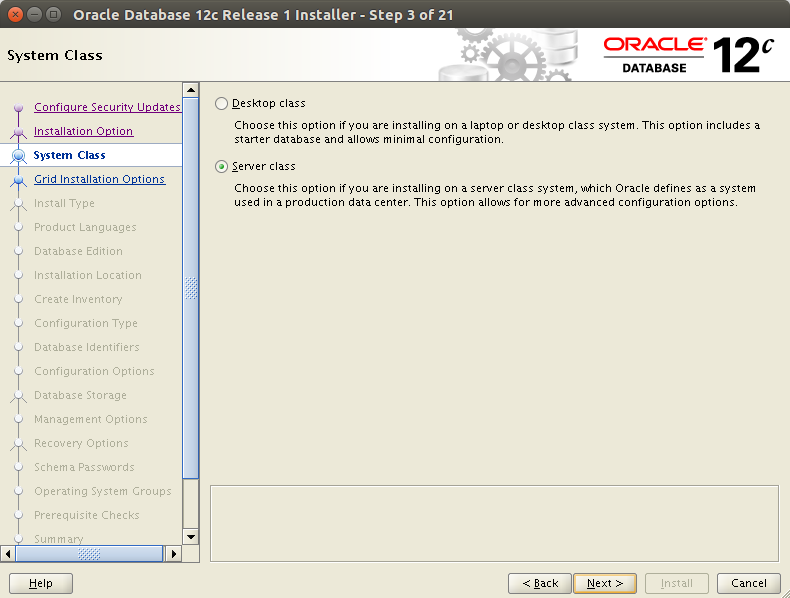
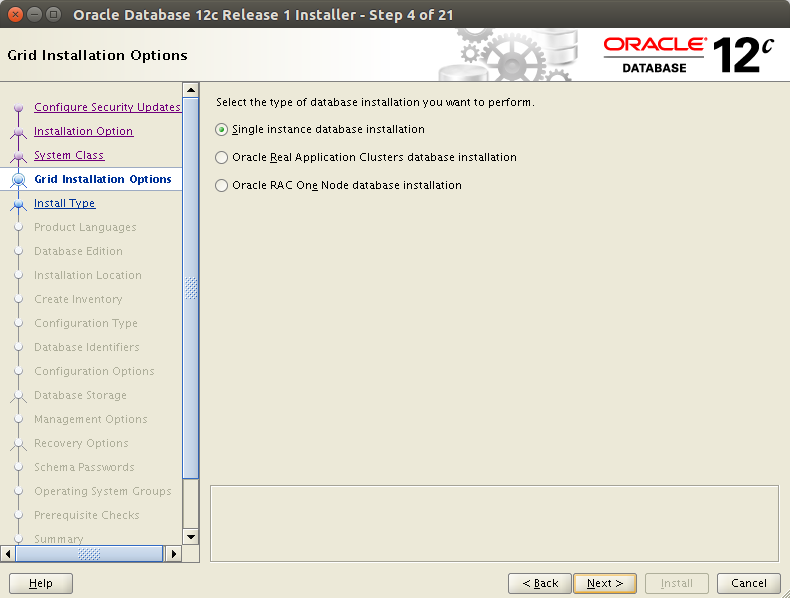
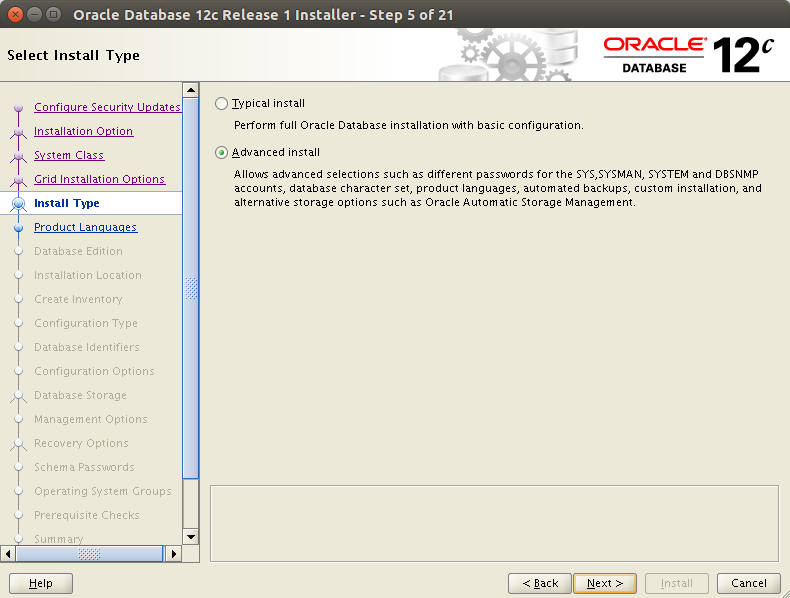
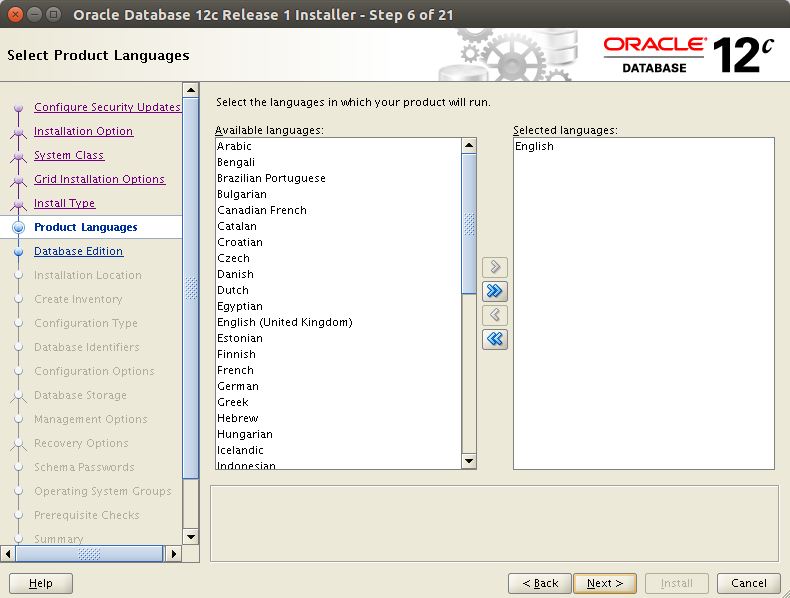
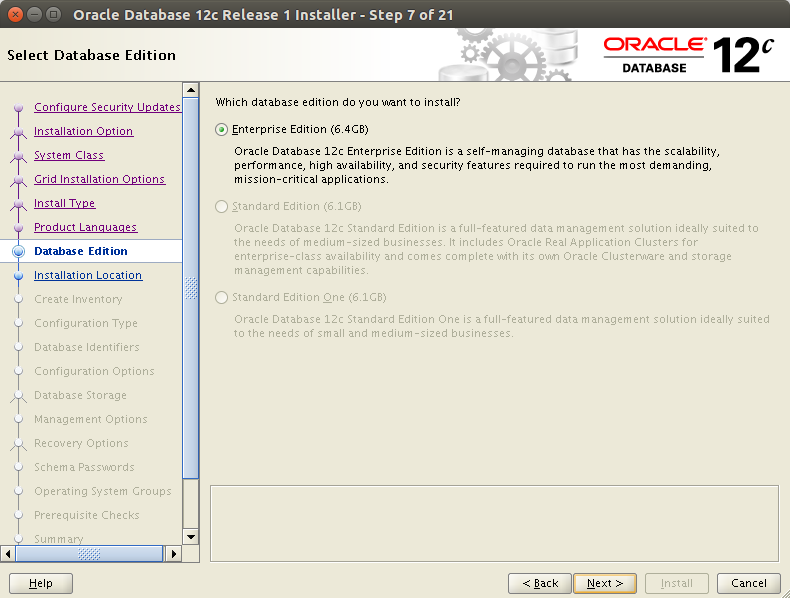
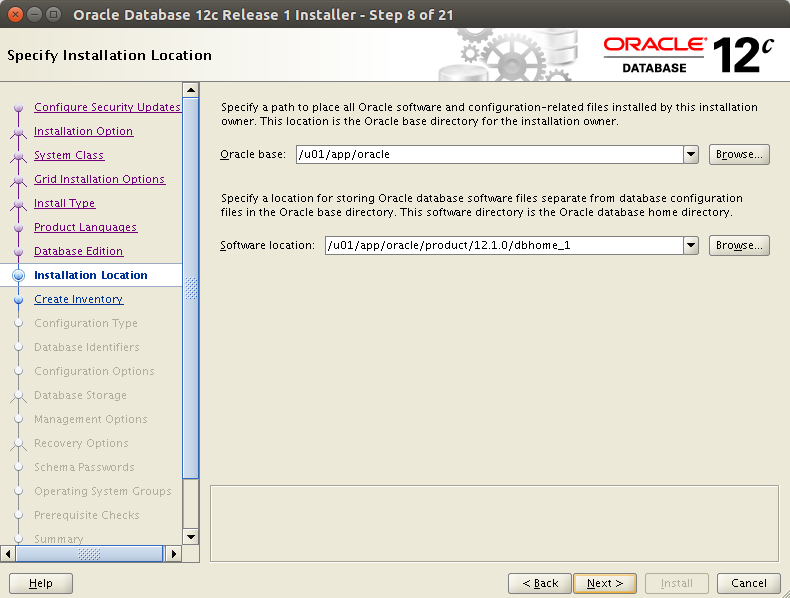
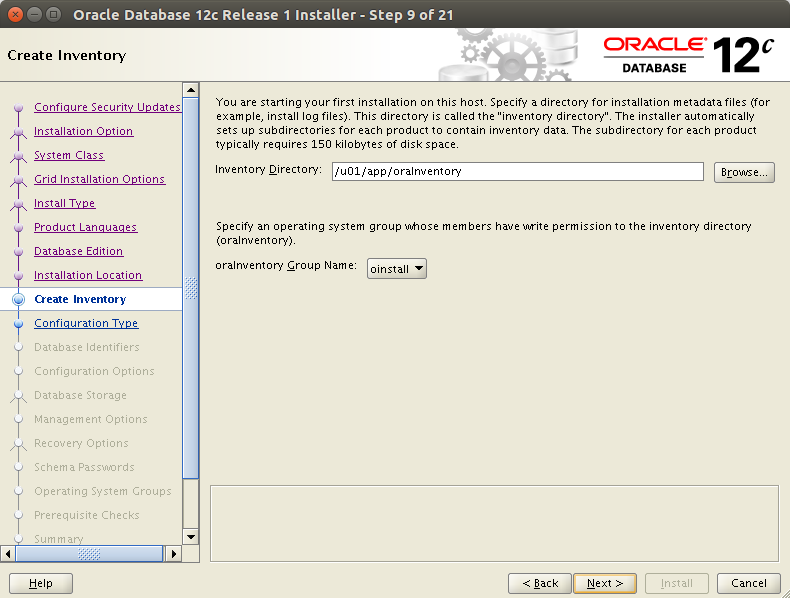
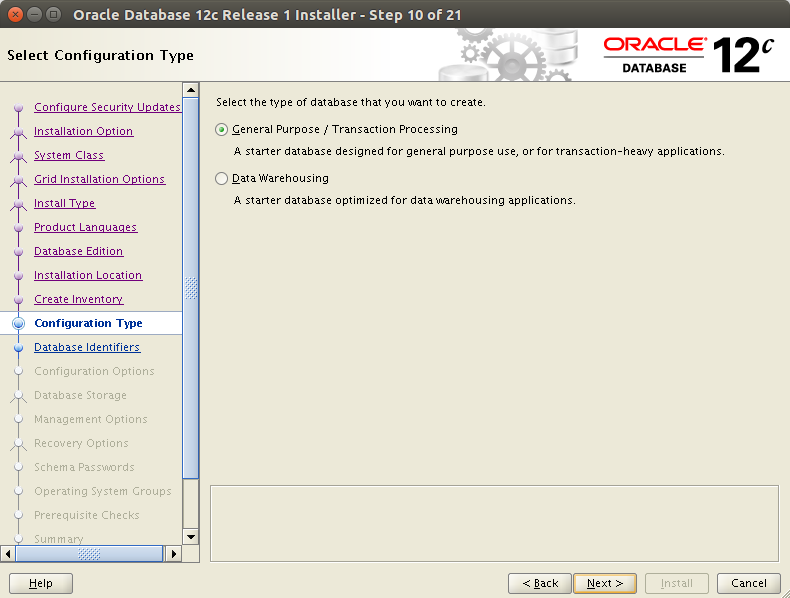
Please choose your SID/service name on the next form. I used “oracle” in this example.
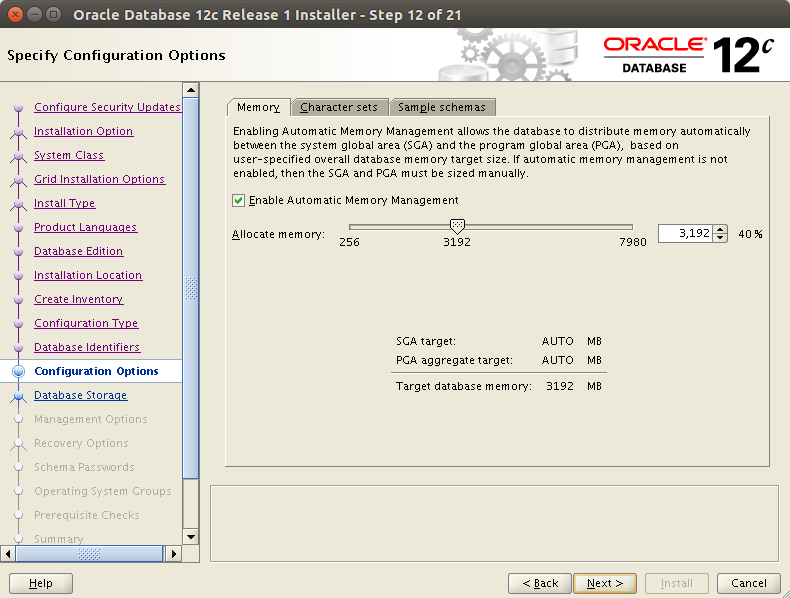
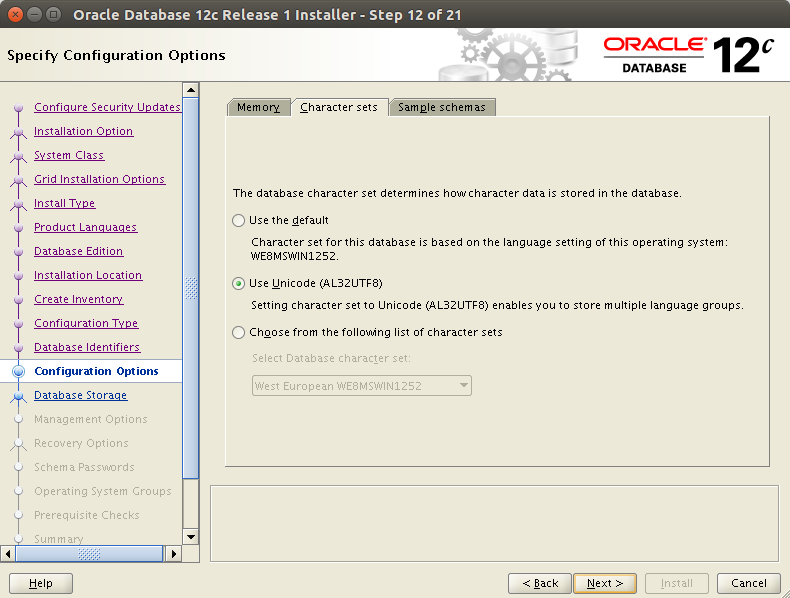
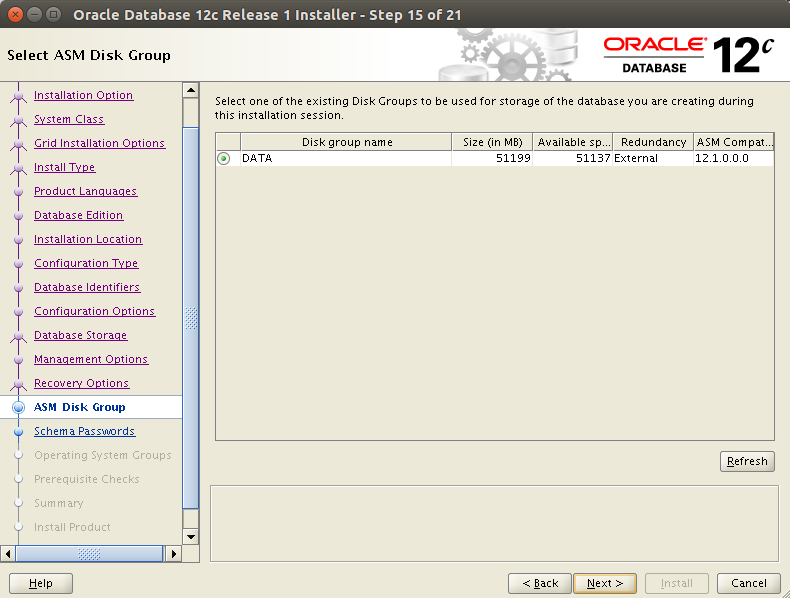
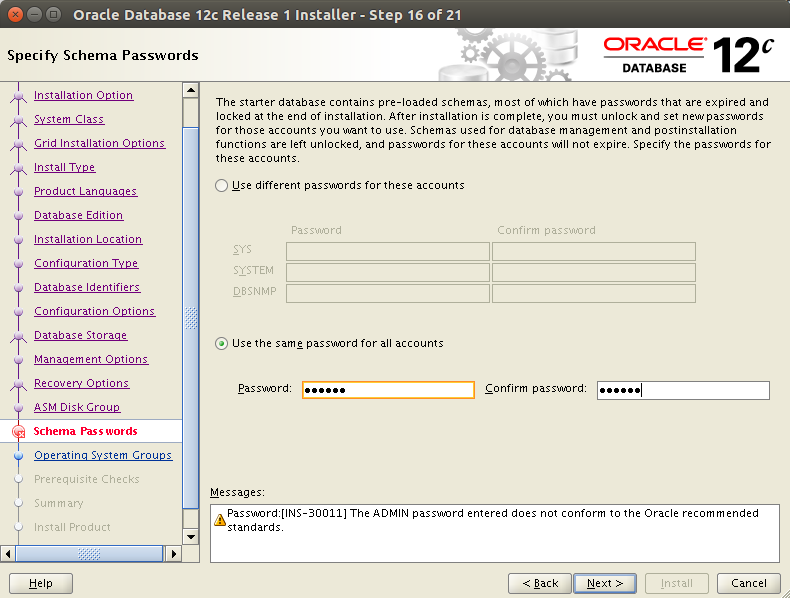
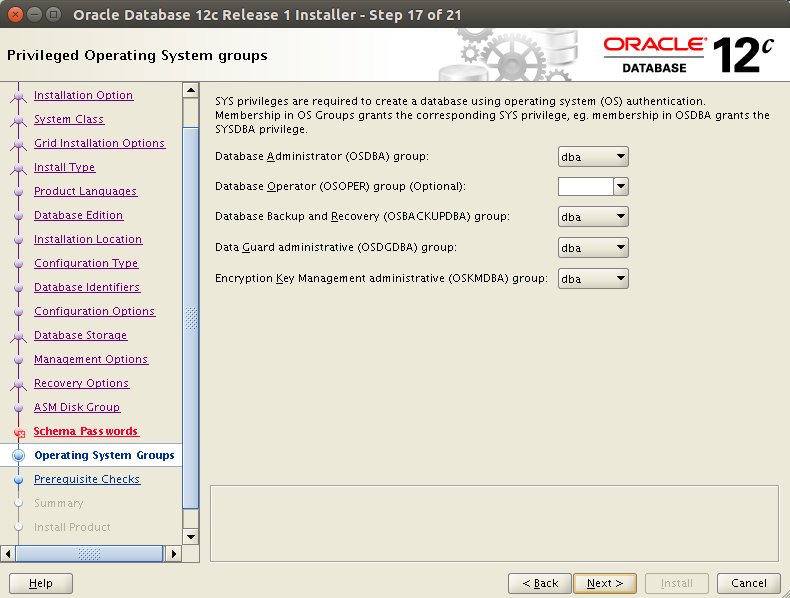
Again we expect a warning about swap size, it’s safe to ignore it:
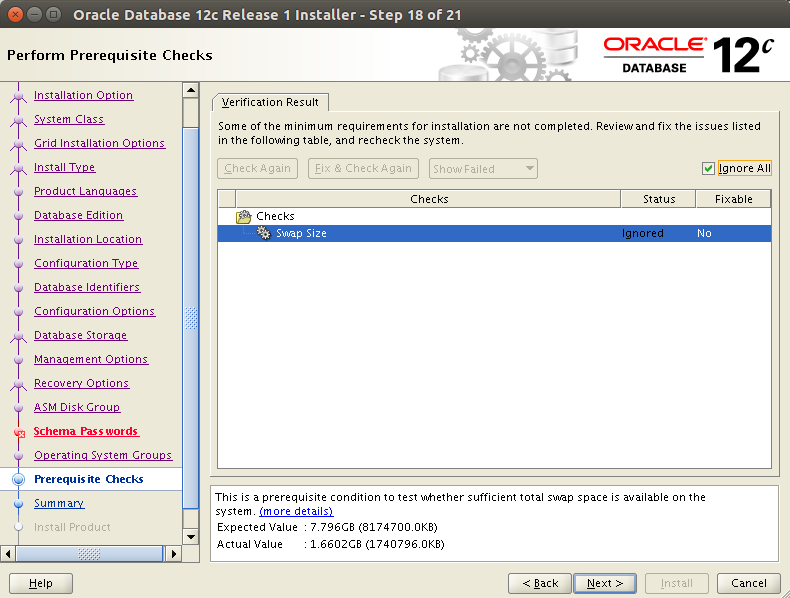
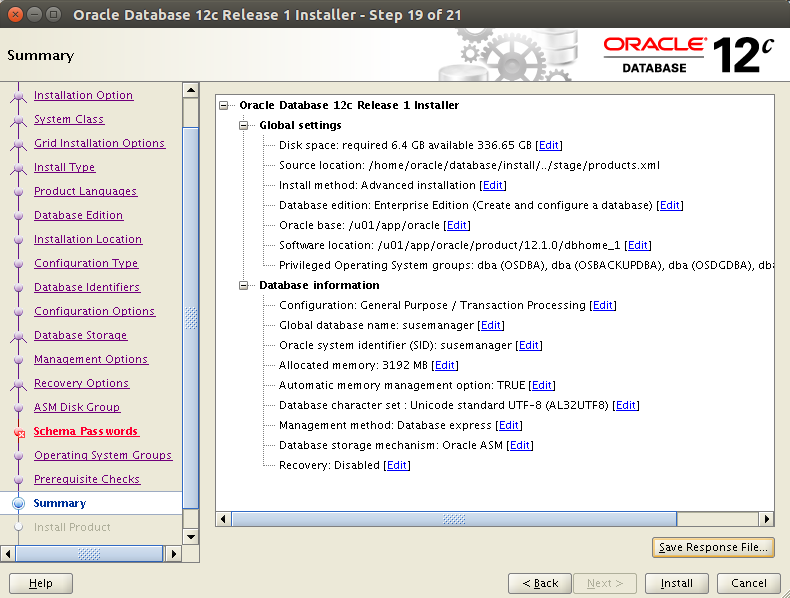
Click on Install and wait for the installation to finish.
How to check the Oracle status
First, check that the ASM disk is available. Log into oracle and issue the following command.
$ su
# oracleasm listdisks
DISK1
#
Second, check that the Grid Infrastructure is running correctly. As root user:
$ su
# . oraenv
ORACLE_SID = [oracle] ? +ASM
The Oracle base has been set to /u01/app/oracle
# crsctl status resource -t
--------------------------------------------------------------------------------
Name           Target  State        Server                   State details
--------------------------------------------------------------------------------
Local Resources
--------------------------------------------------------------------------------
ora.DATA.dg
             ONLINE  ONLINE       oracle                   STABLE
ora.LISTENER.lsnr
             ONLINE  ONLINE       oracle                   STABLE
ora.asm
             ONLINE  ONLINE       oracle                   Started,STABLE
ora.ons
             OFFLINE OFFLINE      oracle                   STABLE
--------------------------------------------------------------------------------
Cluster Resources
--------------------------------------------------------------------------------
ora.cssd
    1        ONLINE  ONLINE       oracle                   STABLE
ora.diskmon
    1        OFFLINE OFFLINE                               STABLE
ora.evmd
    1        ONLINE  ONLINE       oracle                   STABLE
ora.oracle.db
    1        ONLINE  OFFLINE                               Instance Shutdown,ST
                                                           ABLE
--------------------------------------------------------------------------------
Note that the following error might just mean services are not finished starting yet:
CRS-4535: Cannot communicate with Cluster Ready Services
CRS-4000: Command Status failed, or completed with errors.
If you see those right after a VM startup, allow some minutes and try again.
Third, check that the database instance is running well:
$ . oraenv
ORACLE_SID = [oracle] ? oracle
The Oracle base has been set to /u01/app/oracle
$ srvctl config database -d oracle
Database unique name: oracle
Database name: oracle
Oracle home: /u01/app/oracle/product/12.1.0/dbhome_1
Oracle user: oracle
Spfile: +DATA/SUSEMANAGER/PARAMETERFILE/spfile.270.914688961
Password file:
Domain:
Start options: open
Stop options: immediate
Database role: PRIMARY
Management policy: AUTOMATIC
Disk Groups: DATA
Services:
OSDBA group:
OSOPER group:
Database instance: oracle
$ srvctl status database -d racdb
Database is running.
$
Saving Virtual Machine Snapshots
Because the ASM disk is not in the qcow2 format, we cannot make use of libvirt snapshots out-of-the box. The following commands illustrate how to temporarily detach the ASM disk from the virtual machine, backing it up manually, taking a snapshot and restoring the original configuration afterwards.
# shutdown VM
virsh shutdown oracle
# detach ASM disk. Being a raw device it has to be backed up separately
virsh detach-disk oracle /var/lib/libvirt/images/default/oracle-single.img --config
cp /var/lib/libvirt/images/default/oracle-single.img /var/lib/libvirt/images/default/oracle-single.img.backup
# create a snapshot of the main disk
virsh snapshot-create oracle
# reattach the ASM disk and start the VM
virsh attach-disk oracle /var/lib/libvirt/images/default/oracle-single.img vdb --driver qemu --subdriver raw --config
virsh start oracle
Restoring Virtual Machine Snapshots
The following commands allow you to restore from a backup taken with commands from the previous section.
# shutdown VM
virsh shutdown oracle
# detach ASM disk. Being a raw device it has to be backed up separately
virsh detach-disk oracle /var/lib/libvirt/images/default/oracle-single.img --config
cp /var/lib/libvirt/images/default/oracle-single.img.backup /var/lib/libvirt/images/default/oracle-single.img
# create a snapshot of the main disk
virsh snapshot-revert oracle <SNAPSHOT ID>
# reattach the ASM disk and start the VM
virsh attach-disk oracle /var/lib/libvirt/images/default/oracle-single.img vdb --driver qemu --subdriver raw --config
virsh start oracle

Sii il primo a lasciare un commento. Non essere timido!