
This article is a step-by-step HOWTO to set up an Oracle 12c Real Application Cluster (RAC) on Oracle Unbreakable Linux 6.4, with a dedicated Automatic Storage Management (ASM) disk, on a Linux libvirt host (through QEMU with KVM).
The text is an adaptation of an awesome tutorial by lab128.
Overview
We will set up a two-node RAC cluster with a pair of libvirt Virtual Machines. For a quick overview of the RAC architecture I highly recommend this quick video from Hasan Mir.
We will set up virtual networks for:
- the “public” network, used by clients to connect to the cluster
- the “private” network, also known as “interconnect”, used by cluster nodes to talk to one another
- a bridged network to have cluster nodes access the Internet for convenience.
RAC nodes will share one direct-attached virtual disk with ASM as a clustered file system on top of it. This is much easier to implement over a true SAN solution like iSCSI and serves well as a test setup.
System Requirements
- 20 GB of RAM;
- 200 GB of free space on the hard disk;
- libvirt,
virshandvirt-manager. This guide was tested on Ubuntu 14.04 LTS with latest updates
Download Oracle Software
- Oracle Linux: once in the Oracle Cloud service, select “Oracle Linux” and “x86 64-bit”. Then click on release (6.4.0.0.0) and download Oracle Linux Release 6 Update 4 for x86_64 (64 Bit) – V37084-01
- Oracle Database 12c Release 1 Grid Infrastructure (12.1.0.2.0) for Linux x86-64 (use Linux x86-64, then “See All” link)
Virtual Machine Setup
Networking
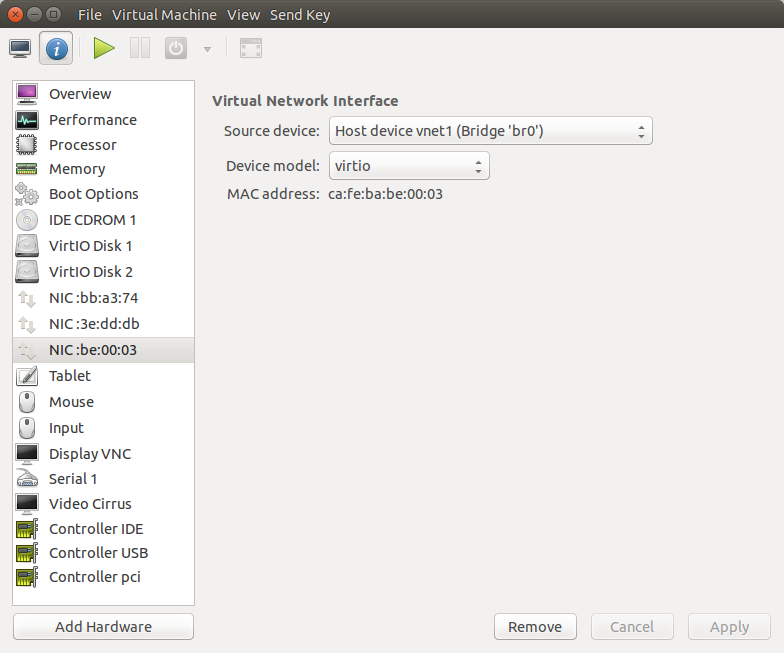
First of all you need a bridge on your libvirt host to a subnet that has access to the Internet. You can follow steps in this guide to set up one in Ubuntu, we will assume the interface name is br0.
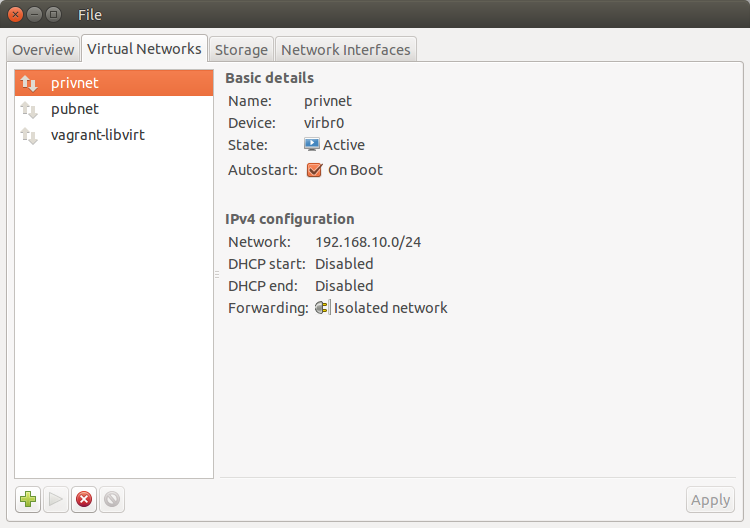
Then you need to set up two new virtual networks: one to connect rac nodes (“public”), and the other to connect clients to them (“private”). You can do so by right clicking on your libvirt connection name from virt-manager, then clicking on “Details”, then on “Virtual Networks”, and then clicking on the “+” button and following the wizard.
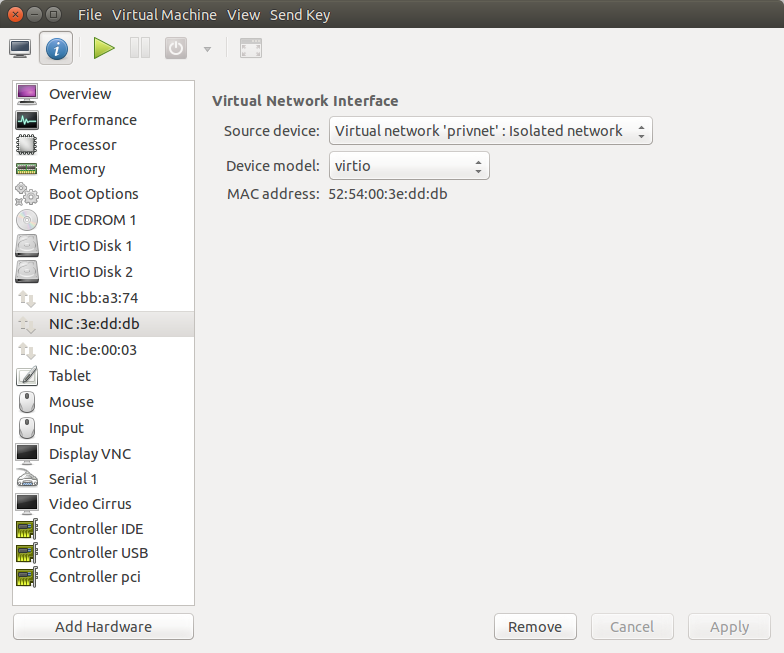
The first network should be 192.168.10.0/24, isolated, named “privnet”. Final result should match the following screenshot:
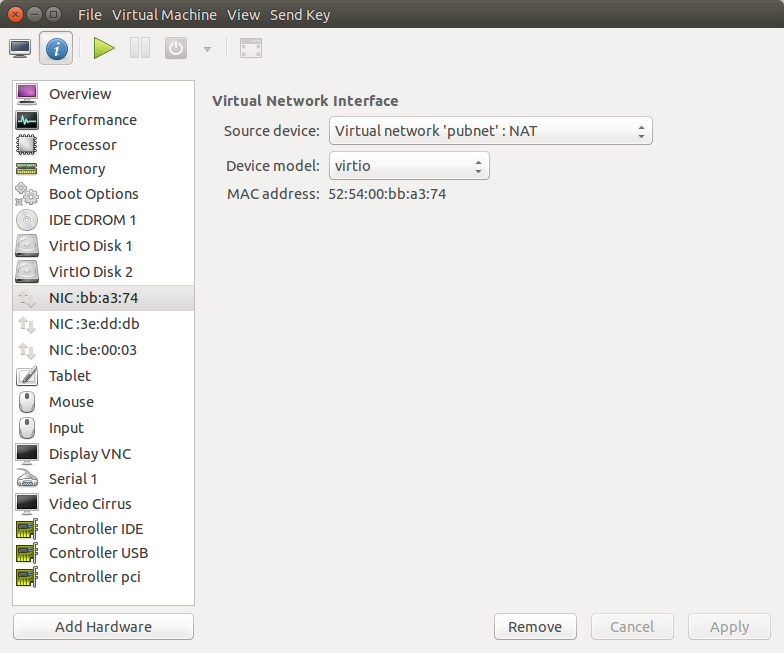
The first network should be 192.168.56.0/24, NATted, named “pubnet”. Final result should match the following screenshot:
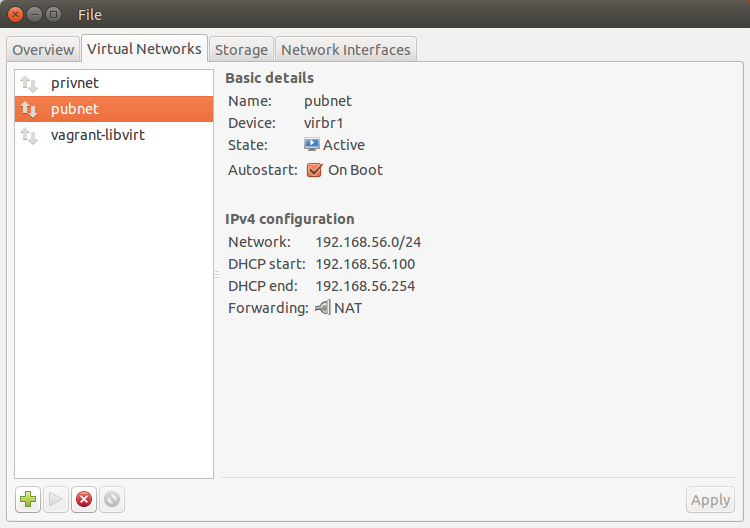
Start both networks.
First node
We will set up the first RAC node, rac1, and then clone it to save time.
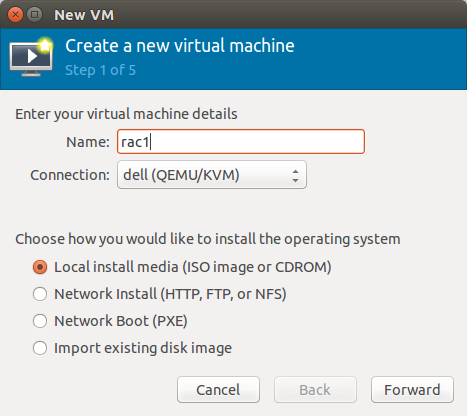
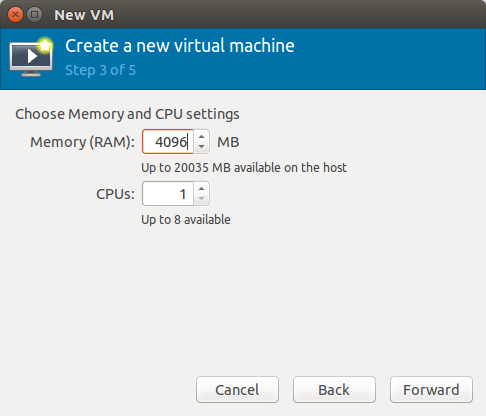
Start virt-manager, right-click on the connection name, select “New”. Then follow these screenshots to set up the first virtual machine:
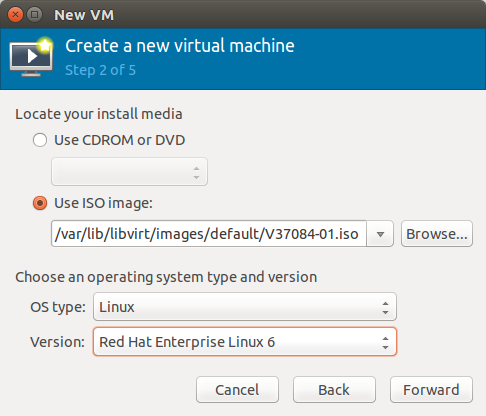
Point the install media ISO to the file you downloaded earlier:
Make sure to select “Select managed or other existing storage” on the next form, then click “Browse” to create a new one:
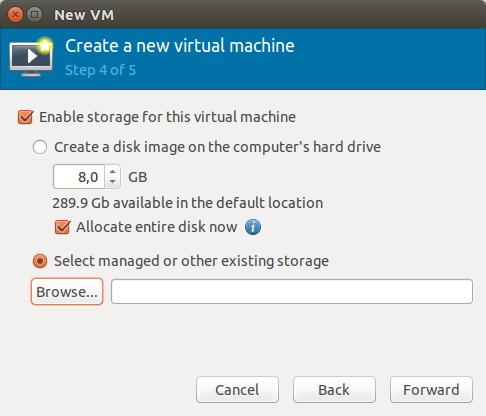
On the following form click on “New Volume”:
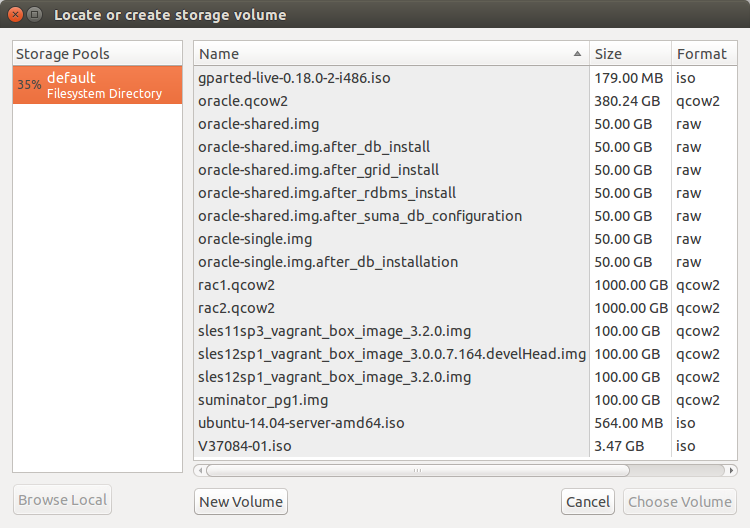
You can use an arbtrary big “Max Capacity” setting, as only actually consumed space will be used in the host.

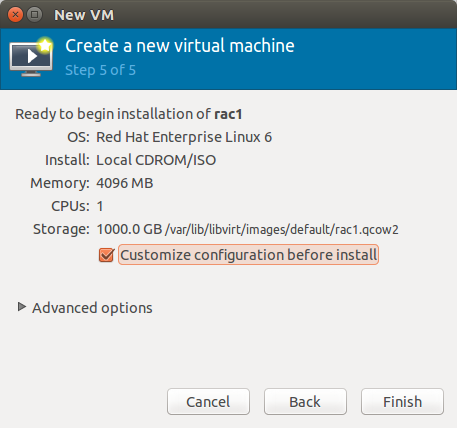
Mark “Customize configuration before install” then click “Finish”.
Now add a virtual networking interface to “pubnet”, one to “privnet” and one to br0 by clicking on the “Add Hardware button” and following the wizard. The three networks should look like the following screenshots:
Guest Operating System Installation
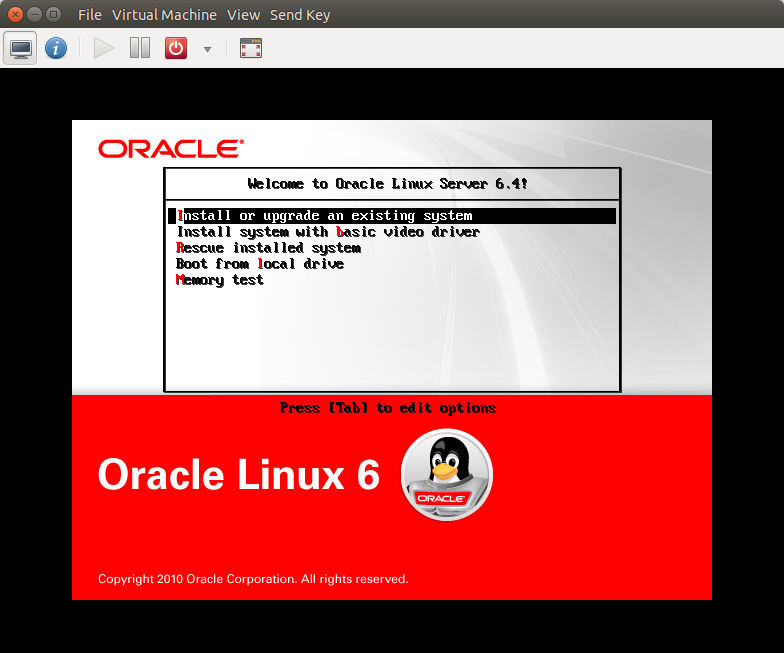
Start the virtual machine by clicking the “Start” button on the toolbar. The resulting console window will contain the Oracle Linux boot screen. Proceed with the “Install or upgrade an existing system”:
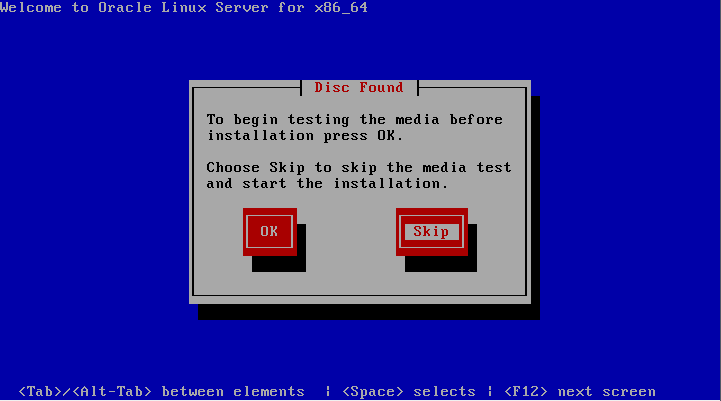
Do not perform the media test. Choose the “Skip” button:
Continue through the Oracle Linux installation as you would for a normal server. On next three screens select Language, Keyboard, and Basic Storage Devices type. Confirm to discard any data.
Note: during installation virt-manager will be keeping the mouse pointer inside VM area. To exit, press the Left Alt and Right Alt keys at the same time.
Note: in this article we used the fake domain name “moio”. You can change it, but keep in mind to make same change throughout this exercise.
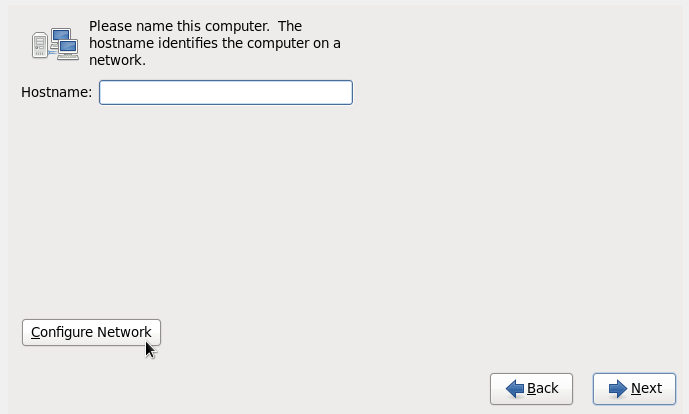
Set “Hostname” to rac1.moio, then press the “Configure Network” button.
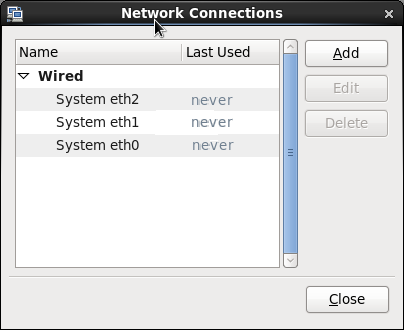
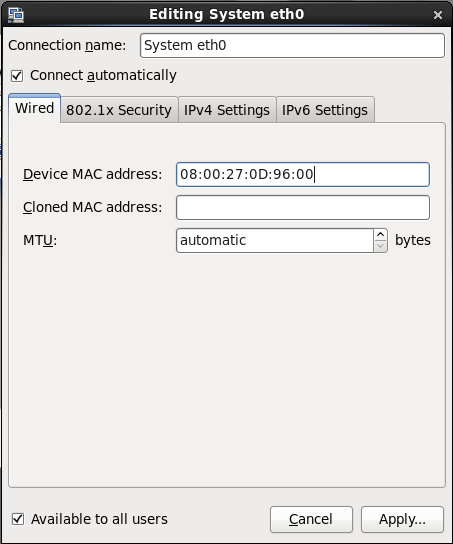
In the Network Connections screen select “System eth0” interface, which will be used for public network, and press “Edit”:
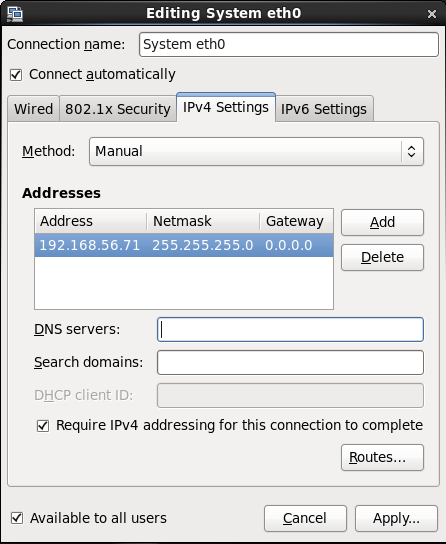
Make sure that “Connect automatically” is checked. Select “IPv4 Settings” tab; change Method to “Manual”; Press “Add” and fill Address: 192.168.56.71; Netmask: 255.255.255.0; Gateway: 0.0.0.0. Press “Apply” then done:
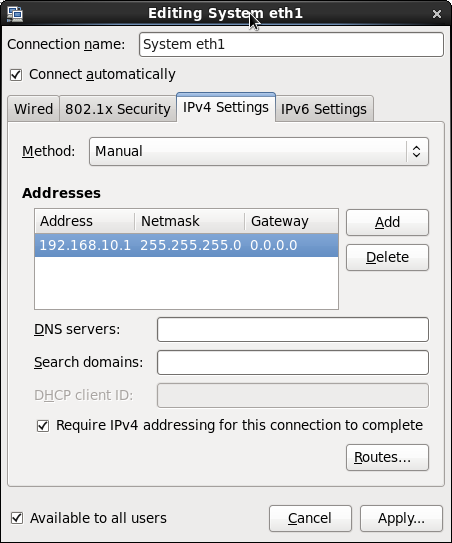
In the Network Connections screen select “System eth1” interface, this will be used for private network, then press “Edit”. Then check the box “Connect automatically”. Select “IPv4 Settings” tab; change Method to “Manual”. Press “Add” and fill Address: 192.168.10.1; Netmask: 255.255.255.0; Gateway: 0.0.0.0. When done, press “Apply”:
Finally select “System eth2” interface, this will be used for Internet, then press “Edit”. Check the box “Connect automatically”. Select “IPv4 Settings” tab make sure the Method is set to “Automatic (DHCP)”. Press “Apply” button:

Close Network Connections screen and proceed to next setup screen. Select the time zone, then type in the Root Password: oracle.
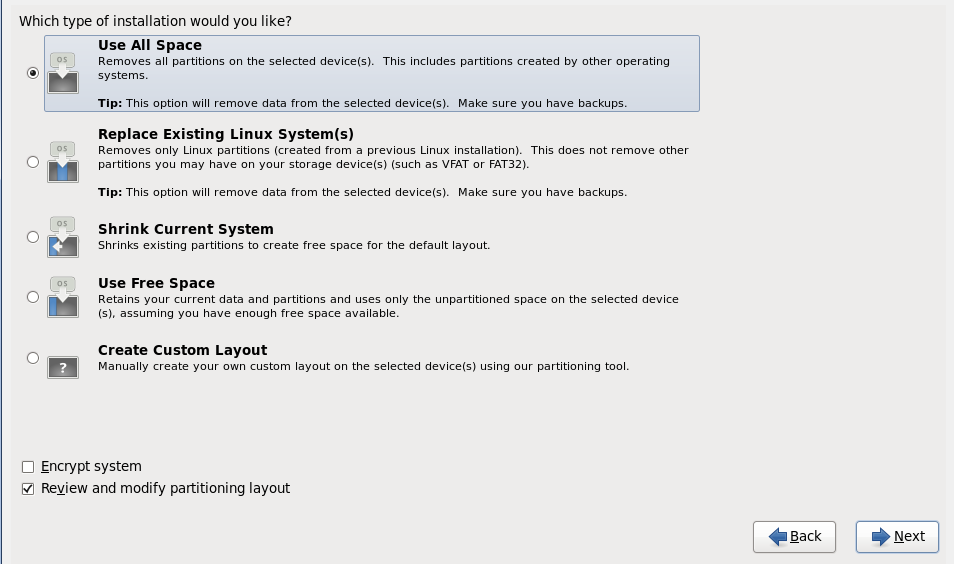
Select “Use All Space” type of installation and check “Review and modify partitioning layout”:
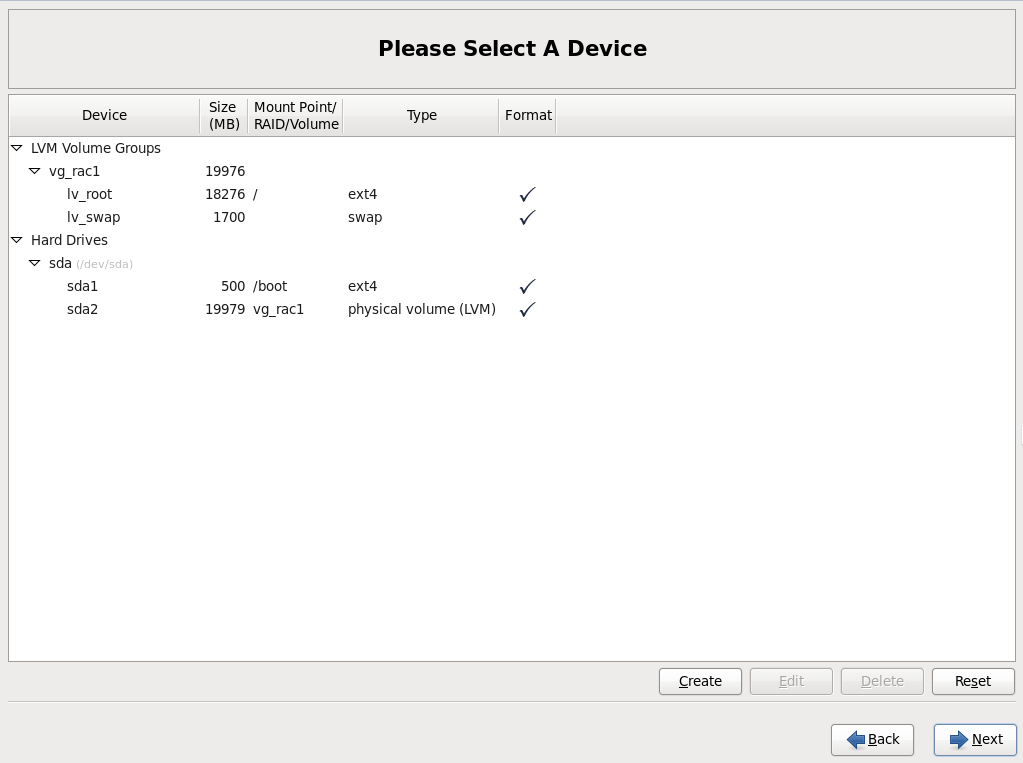
Edit size of lv_swap device to 1700 MB; then edit size of lv_root to the maximum possible size. Press “Next”:
Confirm through warnings and create partitions. Keep defaults in Boot loader screen.
In the software type installation screen select “Database Server” and check “Customize now” button. Then press “Next”:
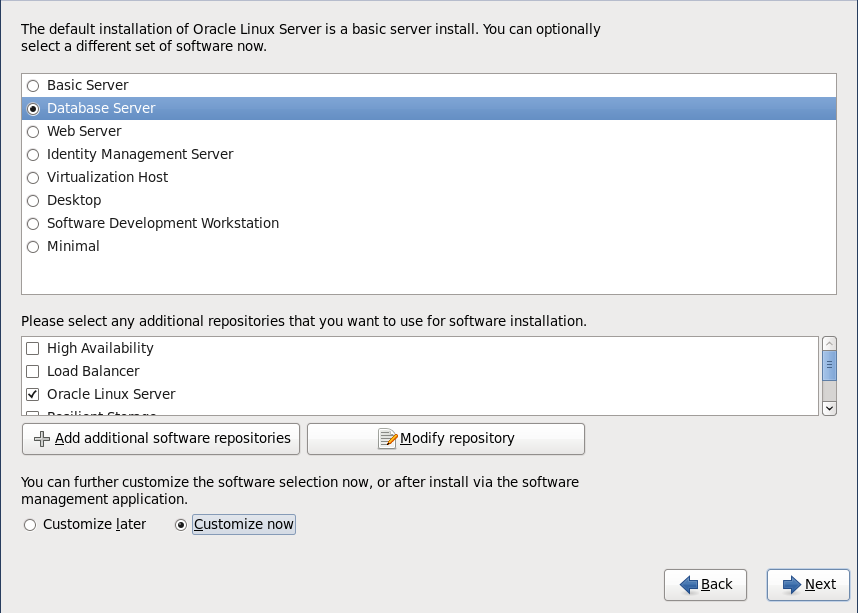
In the Customization screen select “Databases” and uncheck all items; select “Desktops” and check “Desktop” and “Graphical Administration Tools”; then press “Next” and finish the installation, including rebooting.
When the virtual machine is back there will be more obvious setup forms. Don’t create an oracle user account for now (it will be created in the following paragraph). You can skip Kdump settings.
Check Internet Access
We will need Internet access because additional packages will be installed. You can check if it’s working correctly via SSH:
ssh root@rac1.moio
oracle@rac1.moio's password:
Last login: Mon Jun 20 11:32:31 2016 from lenovo.moio
[root@oracle ~]# ping yahoo.com
PING yahoo.com (206.190.36.45) 56(84) bytes of data.
64 bytes from ir1.fp.vip.gq1.yahoo.com (206.190.36.45): icmp_seq=1 ttl=51 time=197 ms
64 bytes from ir1.fp.vip.gq1.yahoo.com (206.190.36.45): icmp_seq=2 ttl=51 time=194 ms
^C
--- yahoo.com ping statistics ---
2 packets transmitted, 2 received, 0% packet loss, time 1641ms
rtt min/avg/max/mdev = 194.214/195.886/197.559/1.730 ms
If ping doesn’t work, troubleshoot the problem using ifconfig and making changes in Network Connections (Linux desktop Main menu | System | Preferences | Network Connections).
Oracle Grid Infrastructure Installation Prerequisites
In order to use RAC, an Oracle Grid Infrastructure installation must be performed (this software was formerly known as “Clusterware”). Before that, a few prerequisites are needed as explained in this section. All of the following commands must be performed by the root user.
Install the oracle-rdbms-server-12cR1-preinstall package. This package performs prerequisites including kernel parameter change and creation of Linux oracle account:
# yum install oracle-rdbms-server-12cR1-preinstall
Then install ASMLib:
# yum install oracleasm
# yum install oracleasm-support
Configure ASMLib with:
# oracleasm configure -i
Configuring the Oracle ASM library driver.
>
This will configure the on-boot properties of the Oracle ASM library
driver.  The following questions will determine whether the driver is
loaded on boot and what permissions it will have.  The current values
will be shown in brackets ('[]').  Hitting <ENTERwithout typing an
answer will keep that current value.  Ctrl-C will abort.
>
Default user to own the driver interface []: oracle
Default group to own the driver interface []: oinstall
Start Oracle ASM library driver on boot (y/n) [n]: y
Scan for Oracle ASM disks on boot (y/n) [y]:
Writing Oracle ASM library driver configuration: done
#
Create the directory in which the Oracle software will be installed:
# mkdir -p /u01/app/12.1.0/grid_1
# mkdir -p /u01/app/oracle
# chown -R oracle:oinstall /u01
# chown oracle:oinstall /u01/app/oracle
# chmod -R 775 /u01/
Add the oracle account to the dba group:
# usermod -G dba oracle
Reset the oracle user password to oracle:
# passwd oracle
Changing password for user oracle.
New password:
BAD PASSWORD: it is based on a dictionary word
BAD PASSWORD: is too simple
Retype new password:
passwd: all authentication tokens updated successfully.
#
Disable secure linux by editing the /etc/selinux/config file, making sure the SELINUX flag is set as follows.
SELINUX=disabled
Either configure NTP, or make sure it is not configured so the Oracle Cluster Time Synchronization Service (ctssd) can synchronize the times of the RAC nodes. In this case we will deconfigure NTP.
# service ntpd stop
Shutting down ntpd:                                        [FAILED]
# chkconfig ntpd off
# mv /etc/ntp.conf /etc/ntp.conf.orig
# rm /var/run/ntpd.pid
Cleanup YUM repositories:
# yum clean all
At this point Oracle installation files must be copied into the Virtual Machine. It is assumed that you already downloaded and uncompressed them into an oracle_sw directory, respectively in a grid and a database subdirectory. You could then use rsync via SSH from the host with downloaded files:
$ rsync -av0 oracle_sw oracle@rac1.moio://home/oracle`
There is one package cvuqdisk that should be installed before the installation. Install it from the Oracle grid/rpm directory as root user:
$ su root
Password:
# cd /media/sf_oracle_sw/grid/rpm
# CVUQDISK_GRP=oinstall; export CVUQDISK_GRP
# rpm -Uvh cvuqdisk*
Network Setup
Below is TCP layout of addresses used in public and private networks. If you need to use another addresses, make corresponding adjustments and remember to stay consistent with those adjustments throughout the rest of this document. Edit /etc/hosts as root by appending the following information:
# Private
192.168.10.1    rac1-priv.moio   rac1-priv
192.168.10.2    rac2-priv.moio   rac2-priv
# Public
192.168.56.71    rac1.moio        rac1
192.168.56.72    rac2.moio        rac2
# Virtual
192.168.56.81    rac1-vip.moio    rac1-vip
192.168.56.82    rac2-vip.moio    rac2-vip
# SCAN
192.168.56.91    rac-scan.moio    rac-scan
192.168.56.92    rac-scan.moio    rac-scan
192.168.56.93    rac-scan.moio    rac-scan
Note. The SCAN address should not really be defined in the hosts file. Instead is should be defined on the DNS to round-robin between 3 addresses on the same subnet as the public IPs. For this installation, we will compromise and use the hosts file. If you are using DNS, then comment out lines with SCAN addresses.
We already set IP addresses of all adapters during Linux installation. If you followed the instructions, there is no need to change anything. But if you need to change something, you can do so with the Network Connections tool: Linux desktop Main menu | System | Preferences | Network Connections.
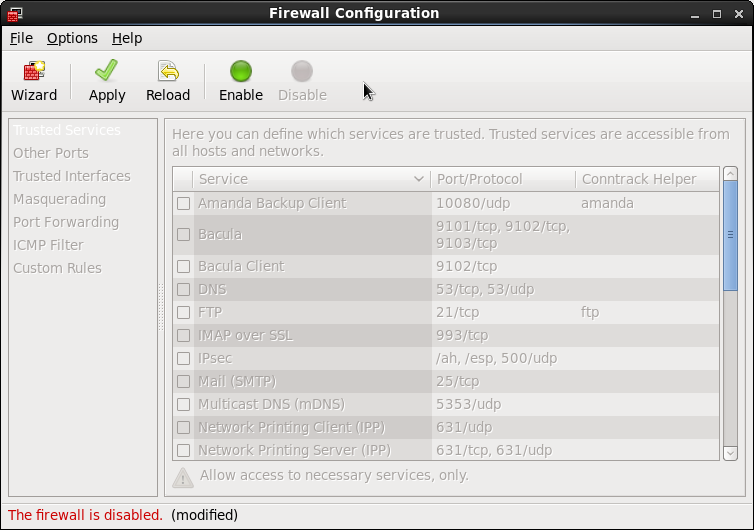
Now we need to disable the firewall: Linux Main menu | System | Administration | Firewall. Click on the “Disable” icon, then on “Apply”.
Clone the Virtual Machine
Shutdown the VM.
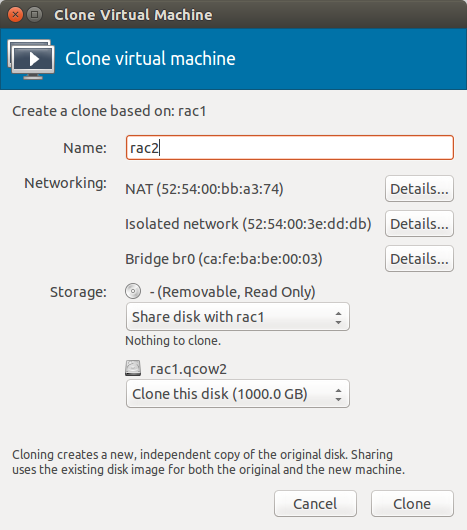
In virt-manager start the clone wizard: right click on rac1, “Clone…”. Type rac2 for the name of new machine. Take note of the newly assigned MAC addresses as you will need them later.
Start the cloned VM rac2 and login as root user direclty from virt-manager, as SSH will not be functional until the network setup is updated.
Then change the machine’s hostname by editing the HOSTNAME parameter in /etc/sysconfig/network:
HOSTNAME=rac2.moio
Start the “Network Connections” tool (Main menu | System | Preferences | Network Connections). Edit the eth0 and eth1 interfaces and set in IPv4 addresses 192.168.56.72 and 192.168.10.2 correspondingly, along with new MAC addresses noted above.
Reboot the Virtual Machine and check it’s accessibility from the outside network and from rac1. Both machines should be able to ping each other using both public and private network. For example, on rac1:
$ ping rac2
$ ping rac2-priv
If you have problems, use the ifconfig command to check the configuration, then correct the problem using “Network Connections” tool.
Shared ASM disk setup
We are now going to create a separate virtual disk and partition which will be shared, through ASM, between RAC nodes. We will use a separate libvirt image file which has a fixed size, as dynamically expanding qcow2 files are currently not handled correctly by ASM.
To create such an image file, please run the following command on the virtualization host:
$ qemu-img create -f raw oracle-shared.img 50G
You can then attach it to rac1 and rac2 either via the virt-manager GUI (just make sure the “Shareable” flag is set) or by using the following commands on the libvirt host:
$ virsh shutdown rac1
$ virsh shutdown rac2 # wait until the virtual machine are actually off
$ virsh attach-disk rac1 /var/lib/libvirt/images/default/oracle-shared.img vdb --driver qemu --subdriver raw --mode shareable --config
$ virsh attach-disk rac2 /var/lib/libvirt/images/default/oracle-shared.img vdb --driver qemu --subdriver raw --mode shareable --config
$ virsh start rac1
$ virsh start rac2
Then you can format the disk with the following commands via SSH on rac1, root user.
First, check that current disks can be seen by the Virtual Machine:
# ls /dev/vd*
/dev/vda  /dev/vda1  /dev/vda2  /dev/vdb
#
Second, use the fdisk command to partition the new disk vdb.
# fdisk /dev/vdb
Device contains neither a valid DOS partition table, nor Sun, SGI or OSF disklabel
Building a new DOS disklabel with disk identifier 0xd724aa83.
Changes will remain in memory only, until you decide to write them.
After that, of course, the previous content won't be recoverable.
Warning: invalid flag 0x0000 of partition table 4 will be corrected by w(rite)
WARNING: DOS-compatible mode is deprecated. It's strongly recommended to
       switch off the mode (command 'c') and change display units to
       sectors (command 'u').
Command (m for help): n
Command action
 e   extended
 p   primary partition (1-4)
p
Partition number (1-4): 1
First cylinder (1-391, default 1):
Using default value 1
Last cylinder, +cylinders or +size{K,M,G} (1-391, default 391):
Using default value 391
Command (m for help): w
The partition table has been altered!
Calling ioctl() to re-read partition table.
Syncing disks.
#
The sequence of answers is “n”, “p”, “1”, “Return”, “Return” and “w”.
Third, check that the partitioning was actually correct by repeating the previous ls command:
# ls /dev/vd*
/dev/vda  /dev/vda1  /dev/vda2  /dev/vdb  /dev/vdb1
#
Fourth, mark the new disk in the ASMLib as follows:
# oracleasm createdisk DISK1 /dev/vdb1
Writing disk header: done
Instantiating disk: done
#
Fifth, run the scandisks command to refresh the ASMLib disk configuration.
# oracleasm scandisks
Reloading disk partitions: done
Cleaning any stale ASM disks...
Scanning system for ASM disks...
#
Finally, check that the disk is now visible to ASM using the listdisks command (both from rac1 and rac2).
# oracleasm listdisks
DISK1
#
From this point on, you can save and restore the Virtual Machine state as described by the following sections: “Saving Virtual Machine Snapshots” and “Restoring Virtual Machine Snapshots”.
Oracle Grid Infrastructure installation
Make sure that both rac1 and rac2 are started, then login to rac1 as oracle user (it is better to avoid using su - command as problems were reported) and start the Oracle installer.
$ ssh -X oracle@rac1.moio
$ cd oracle_sw/grid
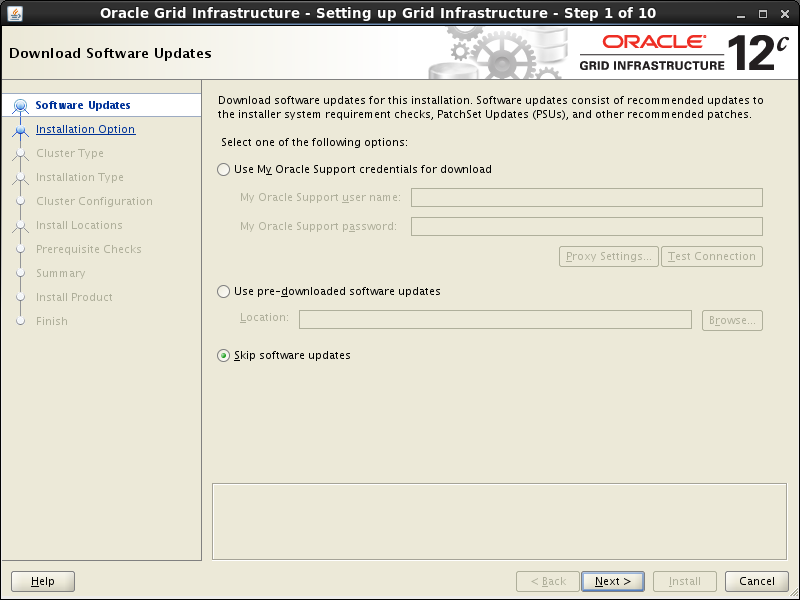
$ ./runInstaller
Select “Skip software updates” option, press “Next”:
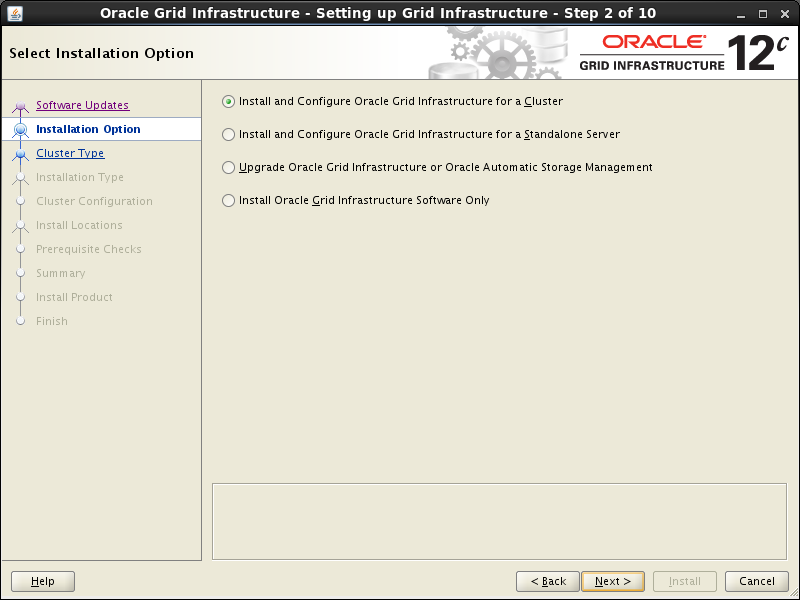
Select the “Install and Configure Grid Infrastructure for a Cluster” option, then press the “Next” button.
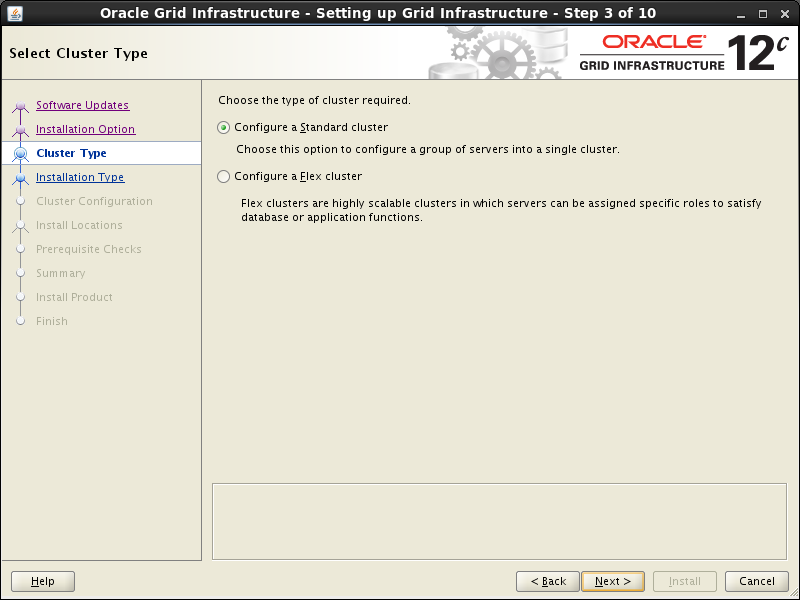
Select the “Configue a Standard cluster” option, then click the “Next” button.
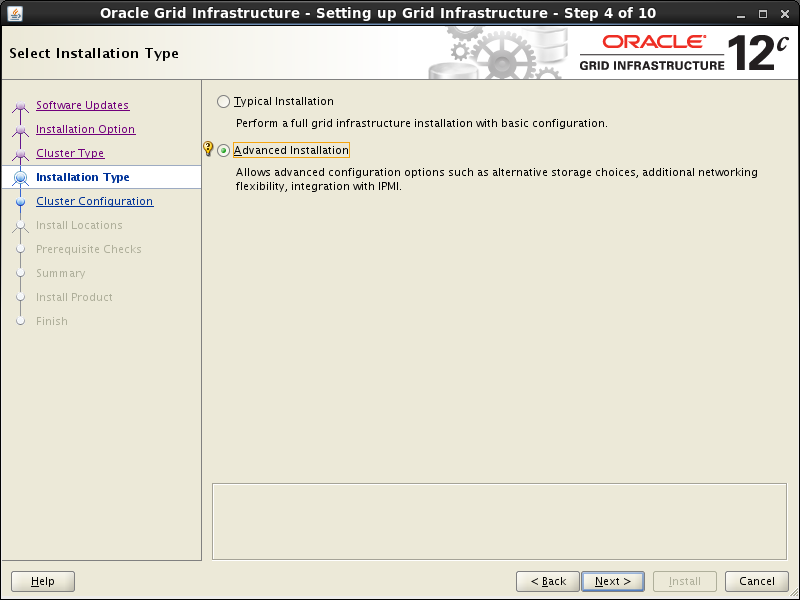
Select the “Advanced Installation” option, then click the “Next” button.
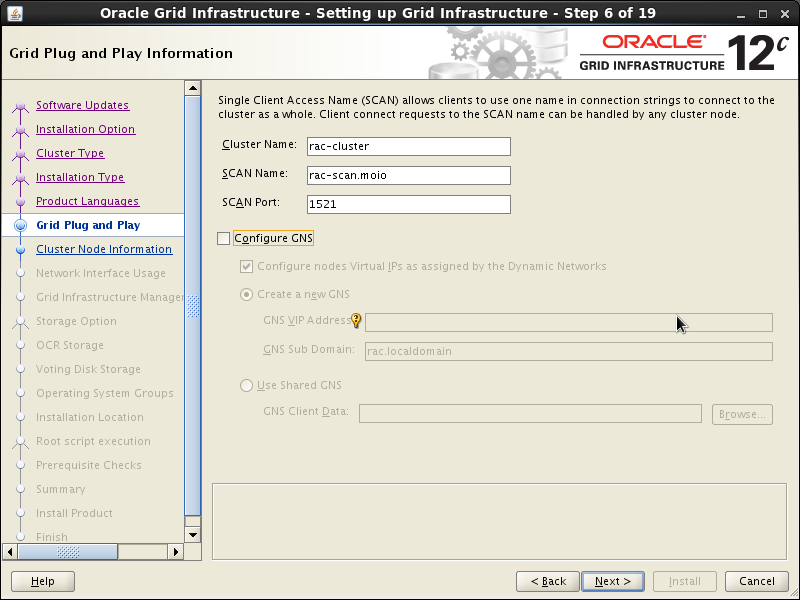
Select Language and go to the next screen. On the “Grid Plug and Play information” screen, change Cluster Name to “rac-cluster” and SCAN Name to “rac-scan.moio”, uncheck “Configure GNS” box, then press the “Next” button.
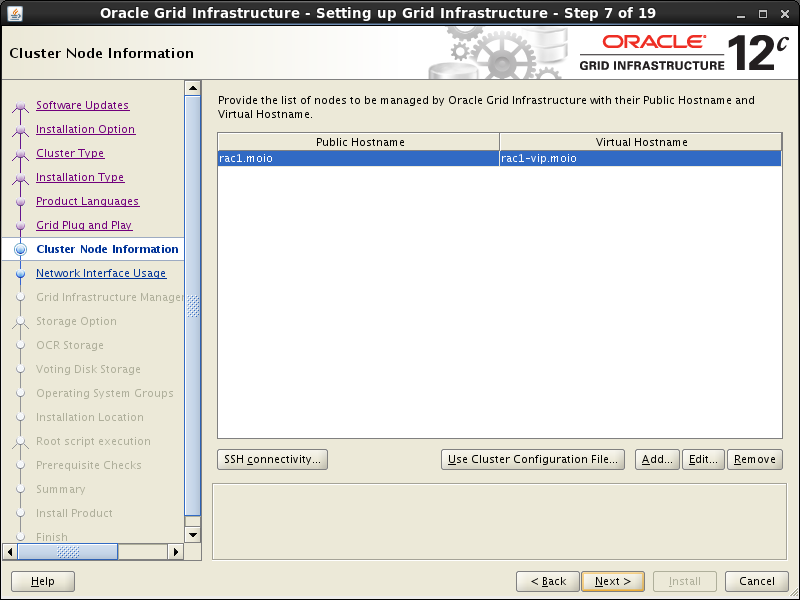
On the “Cluster Node Configuration” screen, click the “Add” button.
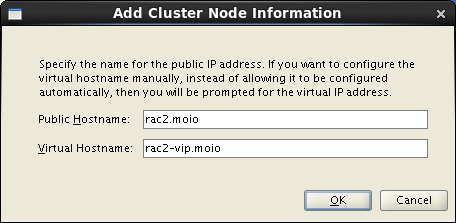
Enter the details of the second node in the cluster, then click the “OK” button.
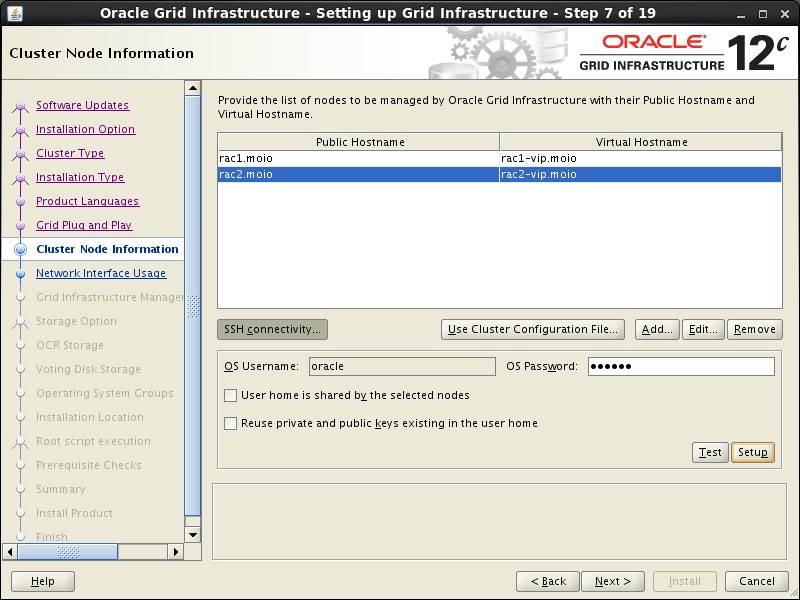
Click the “SSH Connectivity…” button and enter the password for the “oracle” user. Click the “Setup” button to configure SSH connectivity, and the “Test” button to test it once it is complete. Then press “Next”.
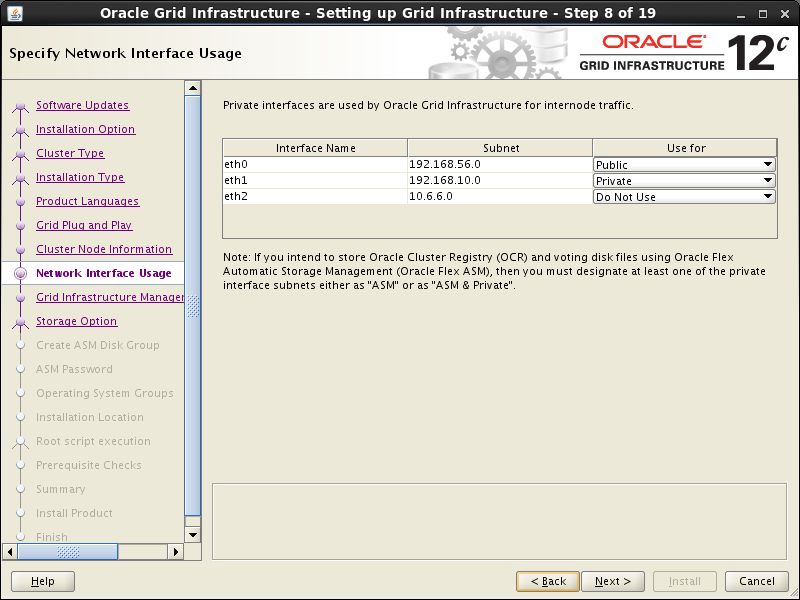
On the “Specify Network Interface Usage” screen check the Public and Private networks are specified correctly. Press the “Next” button.
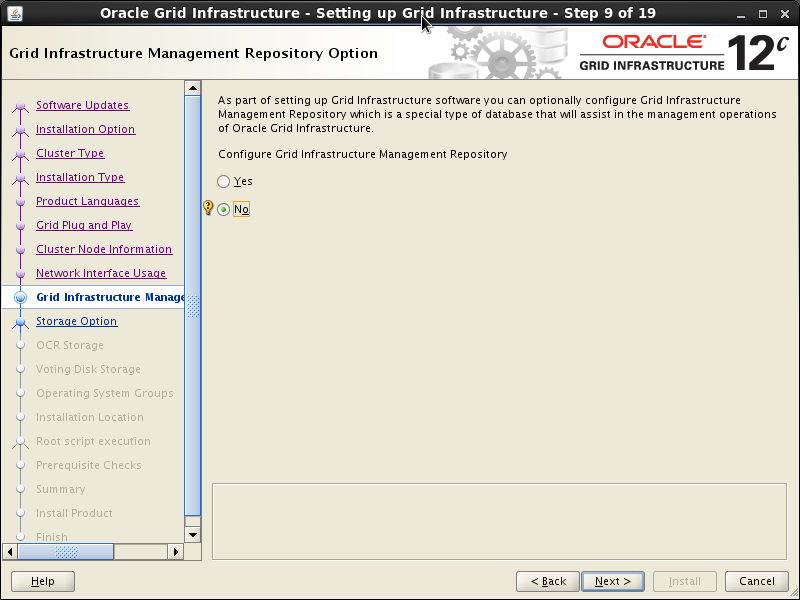
On the “Grid Infrastructure Management Repository Option” screen check “No” and press the “Next” button. Confirm this decision on the next screen.
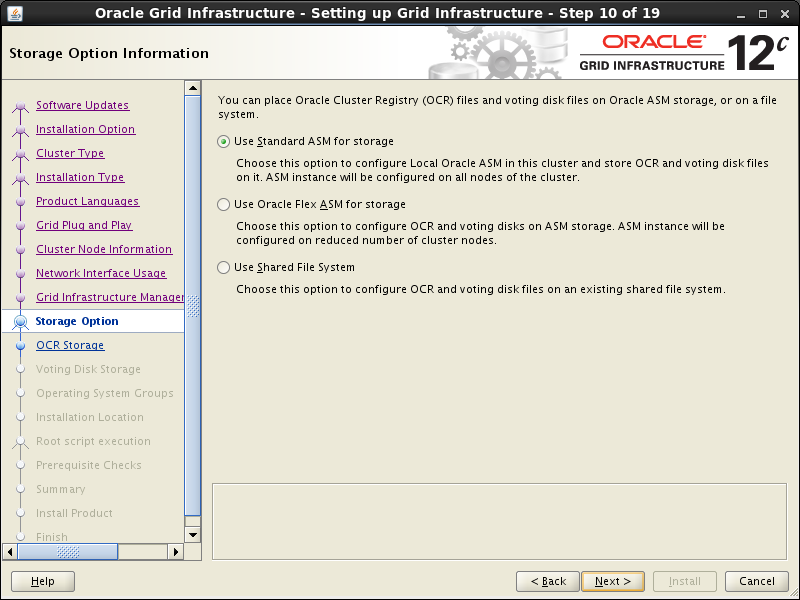
On the “Storage Option Information” screen keep Oracle ASM option selected and press “Next”.
On the “Create ASM Disk Group” screen click on “Change Discovery Path” button:
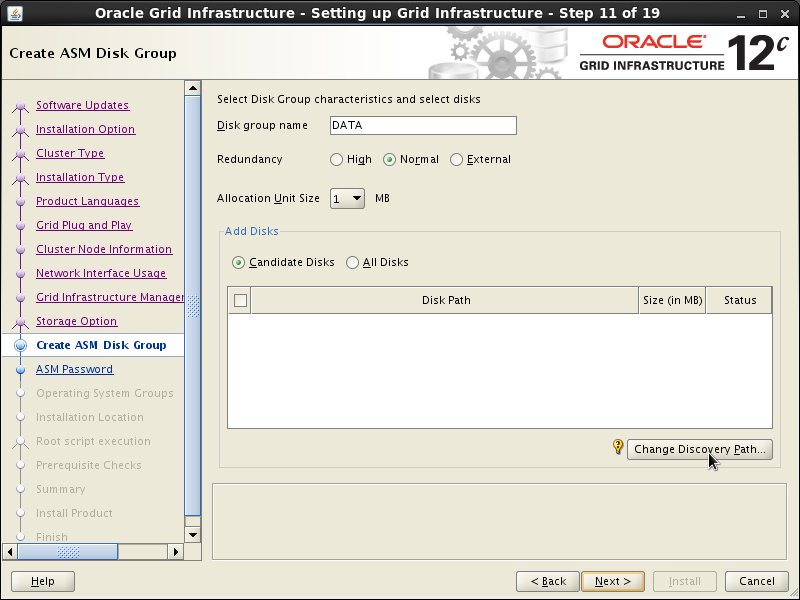
Enter /dev/oracleasm/disks (shown in the screenshot below). Press “OK”:

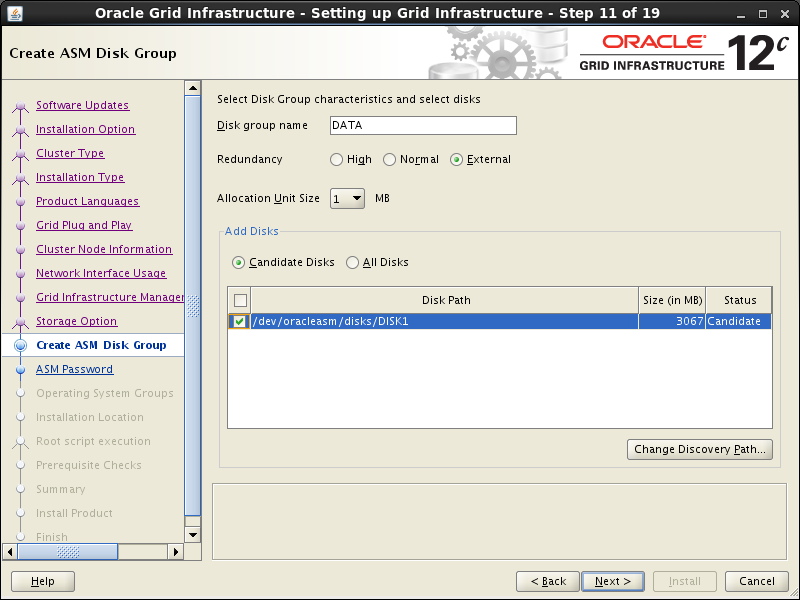
Keep “Disk Group Name” unchanged. Select “External” redundancy option. Check that /dev/oracleasm/disks/DISK1 is in the “Add Disks” section. When done, press “Next”.
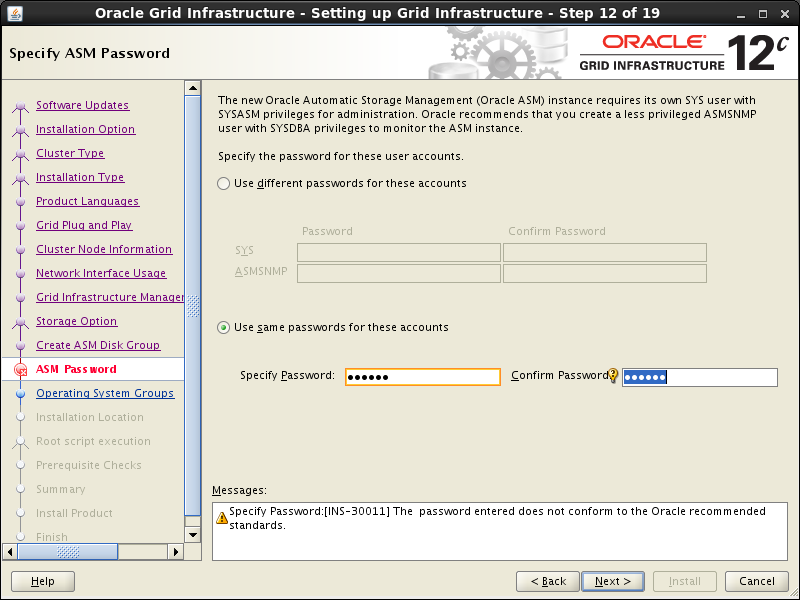
On the “Specify ASM Password” screen select “Use same passwords for these accounts” option and type in “oracle” password, then press “Next”. Ignore warnings about password weakness.
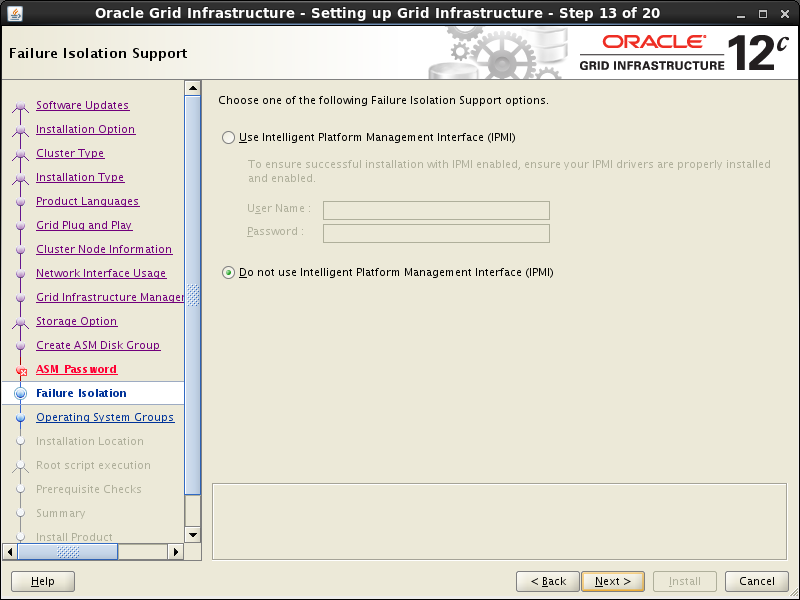
Keep defaults on the “Failure Isolation Support” and press “Next”.
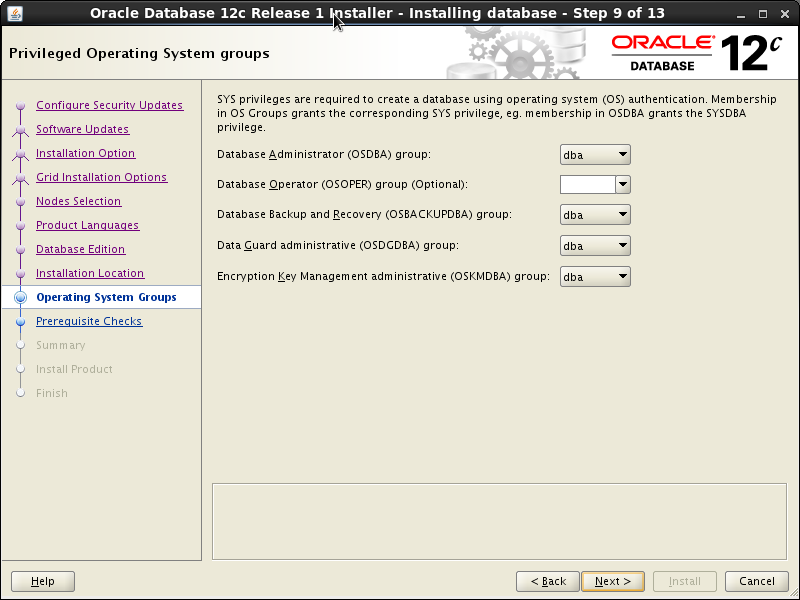
Keep defaults on the “Privileged Operating System Groups” and press “Next”. Ignore warning on the next screen.

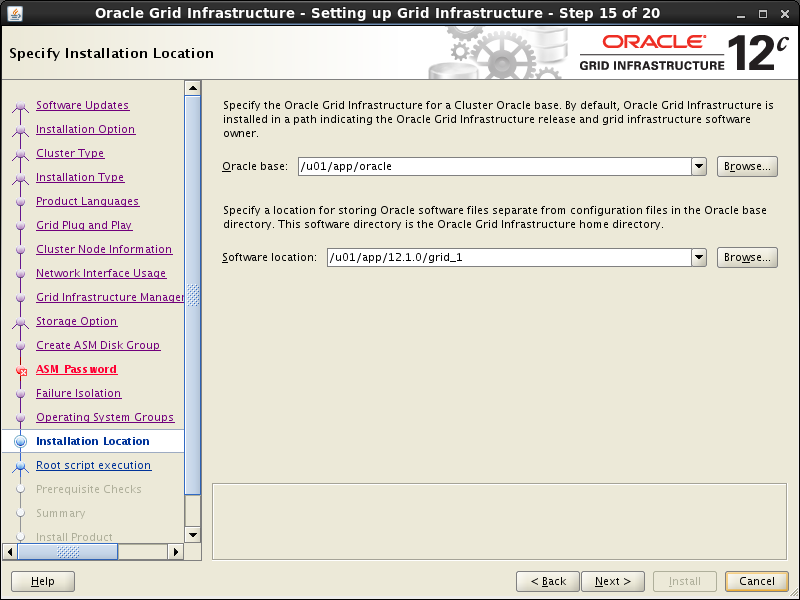
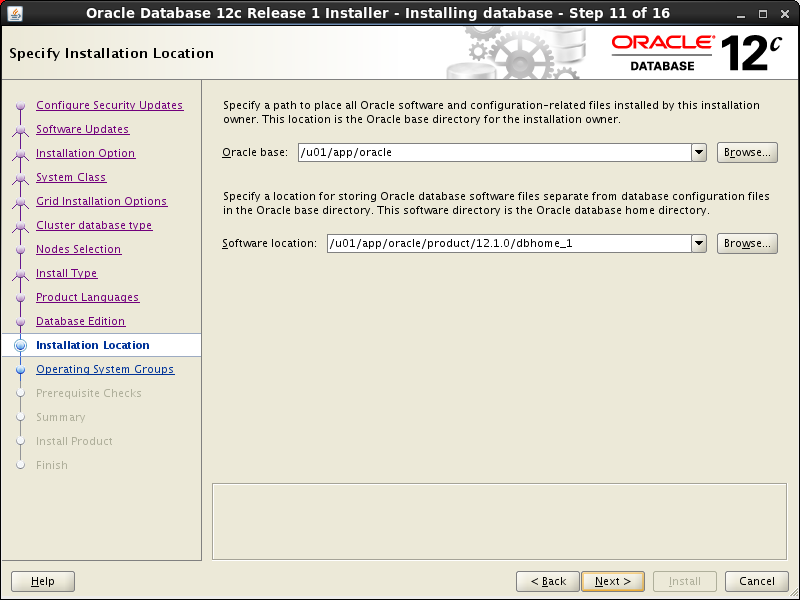
Keep suggested Oracle base unchanged, and adjust Software location on the “Specify Installation Location” and press “Next”.
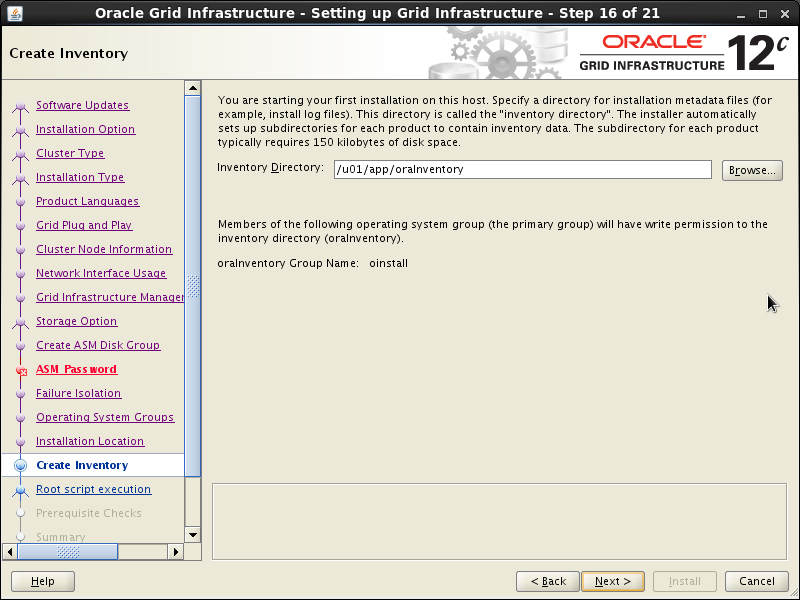
Keep suggested path unchanged on the “Create Inventory” and press “Next”.
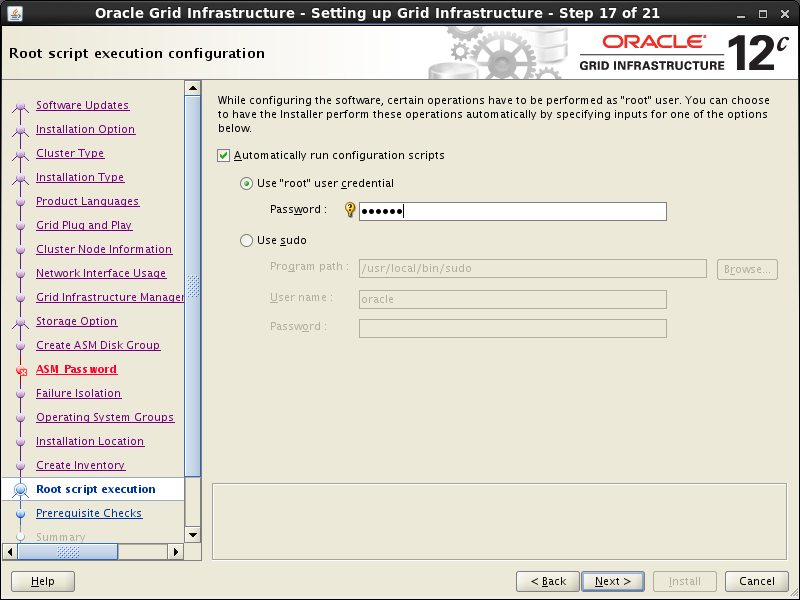
In the “Root script execution configuration” select “Automatically run configuration scripts” and check “Use root option”, then type password oracle. Press “Next”.
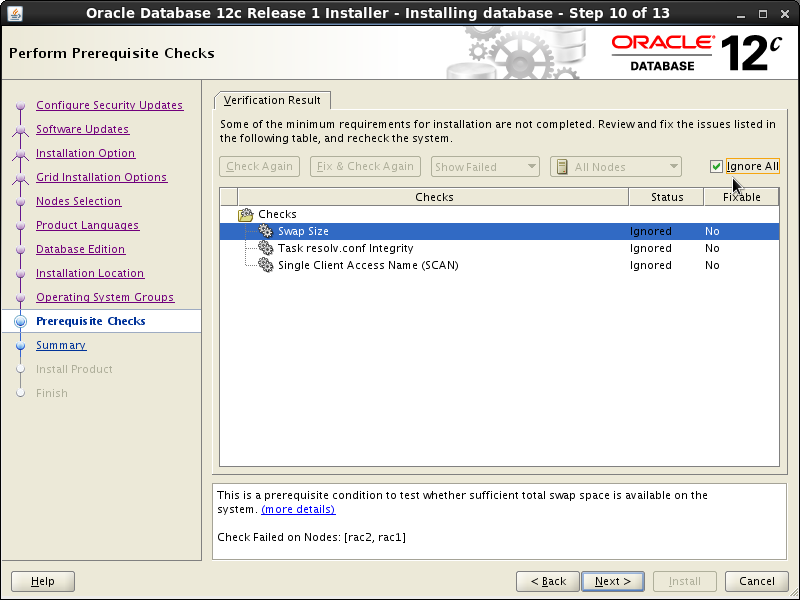
The results of prerequisite checks are shown on the next screen. You should see three warnings and one failure. The failure was caused by inability to lookup SCAN in DNS and that should be expected. Check “Ignore All” box and press “Next”.

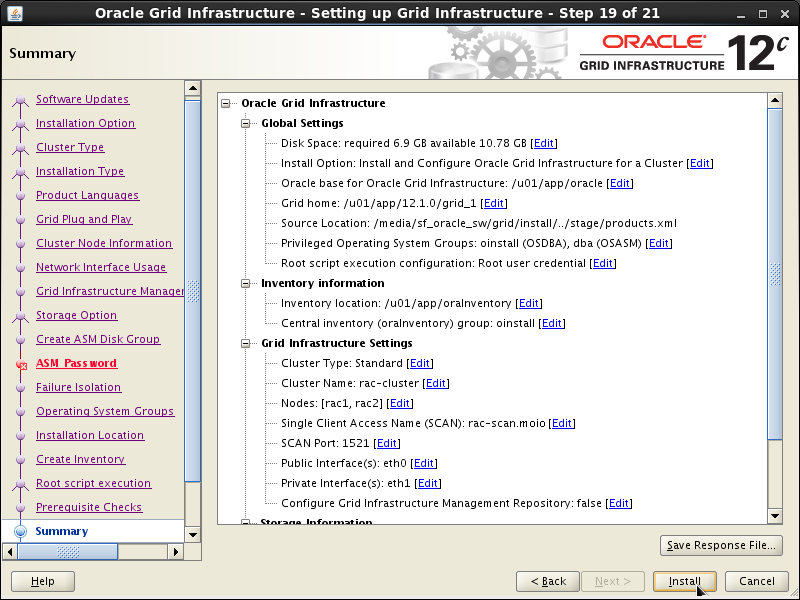
Press “Install” on the Summary screen.
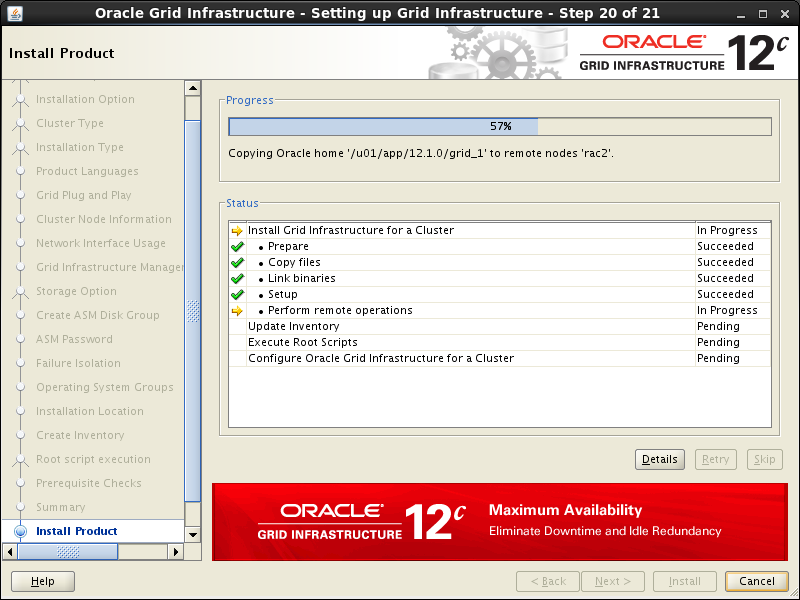
Wait while installation takes place, it will take several minutes with occasional slowdowns which might appear as if the system was stuck. When asked to confirm root scripts execution, answer Yes.
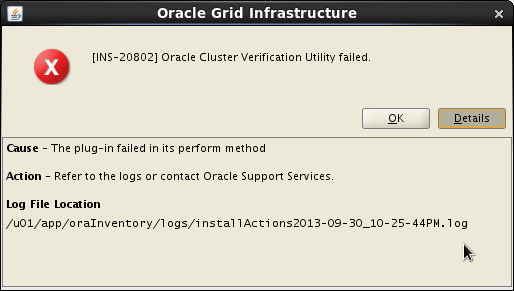
We expect the verification phase to fail with errors related to low Host RAM, Swap File sizes, group mismatch for DISK1, and “udev information”. These errors can be ignored. You can check errors opening log file ( /u01/app/oraInventory/logs/installActions<DATE><TIME>.log, shown below), then searching for “Error”.
Here is the example of offending lines from the log file for rac1:
INFO: INFO: Error Message:PRVF-7530 : Sufficient physical memory is not available on node "rac1" [Required physical memory = 4GB (4194304.0KB)]
INFO: INFO: Cause: Amount of physical memory (RAM) found does not meet minimum memory requirements.
INFO: INFO: Action: Add physical memory (RAM) to the node specified.
...
INFO: INFO: Error Message:PRVF-7573 : Sufficient swap size is not available on node "rac1" [Required = 2.9462GB (3089292.0KB) ; Found = 1.6602GB (1740796.0KB)]
INFO: INFO: Cause: The swap size found does not meet the minimum requirement.
INFO: INFO: Action: Increase swap size to at least meet the minimum swap space requirement.
...
INFO: INFO: ERROR: [Result.addErrorDescription:618]  PRVF-9992 : Group of device "/dev/oracleasm/disks/DISK1" did not match the expected group. [Expected = "dba"; Found = "oinstall"] on nodes: [rac1, rac2]
...
oracle
INFO: INFO: ERROR: [Result.addErrorDescription:607]  PRVF-9802 : Attempt to get udev information from node "rac1" failed
INFO: No UDEV rule found for device(s) specified
INFO:
...
Error Message:PRVG-5150 : could not determine if path /dev/oracleasm/disks/DISK1 is a valid path on all nodes
...
Error Message:PRVG-1101 : SCAN name "rac-scan.moio" failed to resolve
Provided these are the only errors, it is safe to ignore them and continue by clicking the “Next” button. Close the Configuration Assistant on the next screen.
At the end of this procedure the Oracle Grid Infrastructure should be correctly installed. You can check that it is online on both nodes following instructions in “How to check the Oracle RAC status”.
Oracle Database installation
Login to rac1 as oracle user (better to avoid using su - command, problems were reported) and start the Oracle installer.
$ ssh -X oracle@oracle.moio
$ cd oracle_sw/database
$ ./runInstaller
Uncheck the “I wish to receive security updates…” checkbox and press the “Next” button:

Check the “Skip software updates” checkbox and press the “Next” button:
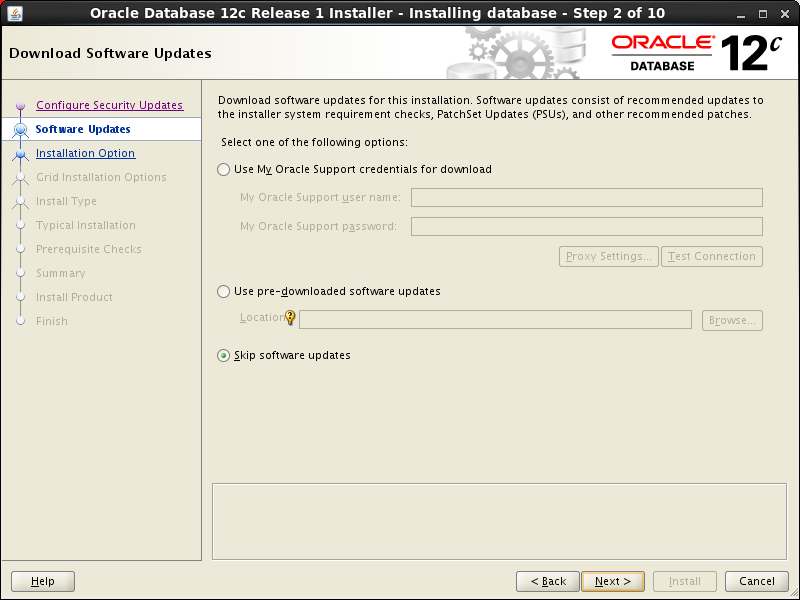
Check the “Install database software only” option and press the “Next” button:
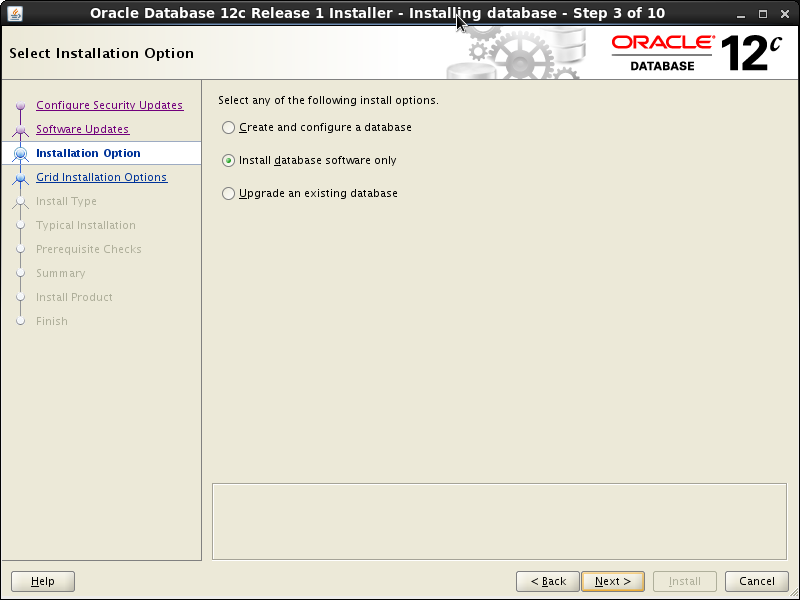
Select “Oracle Real Application Cluster database installation” and then press the “Next” button.

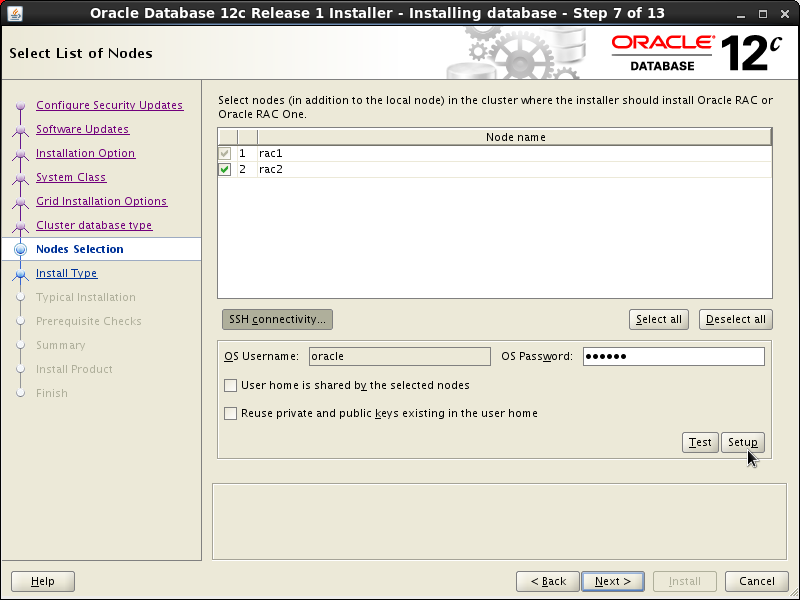
Make sure both nodes are selected. Press on “SSH Connectivity”, enter “oracle” as the password and then press the “Setup” button. After the SSH connectivity setup is finished, press “Test” button to test it. Then press “Next”.
Select Language on next screen and press the “Next” button.
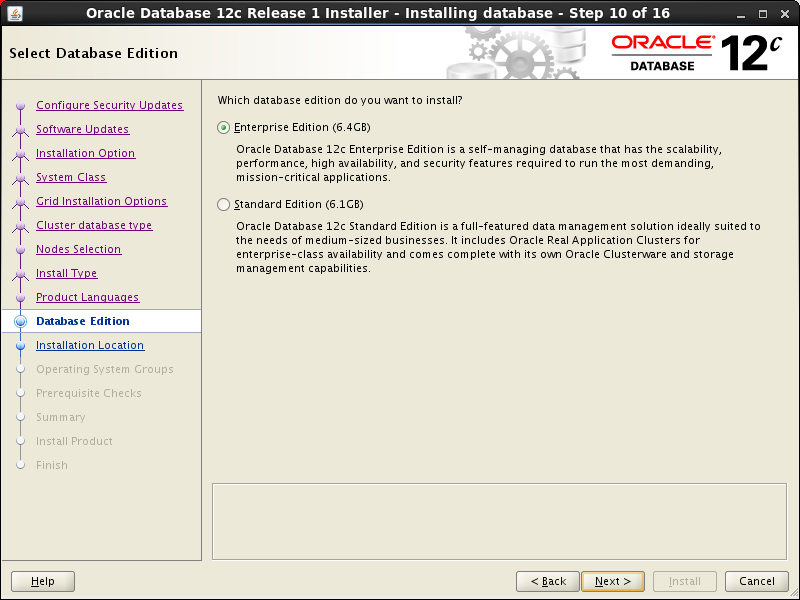
Accept “Enterprise Edition” option and press the “Next” button:
Accept default installation locations and press the “Next” button:
Accept default groups in “Privileged Operation System groups” and then press the “Next” button:
Wait for the prerequisite check to complete. If there are any problems, either fix them, or check the “Ignore All” checkbox. On the screenshot below 3 warnings are shown which are safe to ignore. Click the “Next” button.
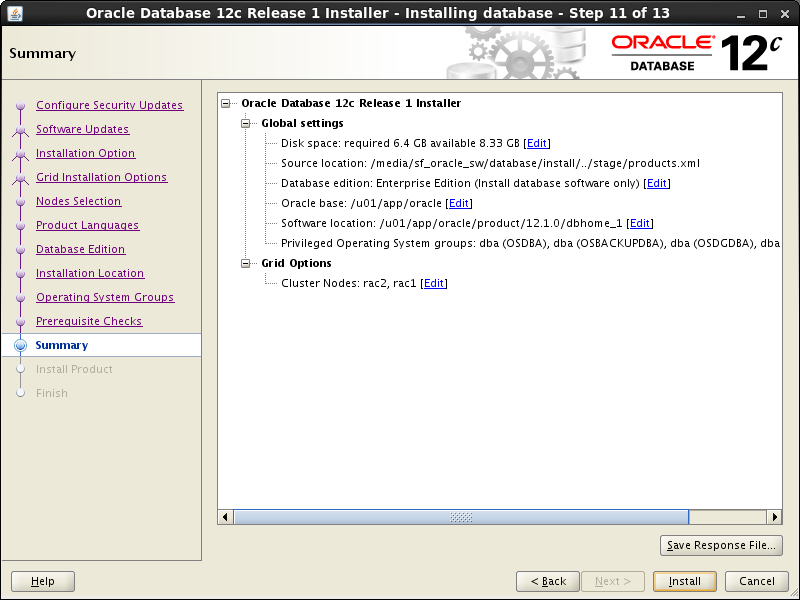
If you are happy with the summary information, click the “Install” button.
Wait while the installation takes place.

Execute root scripts when prompted on both nodes.
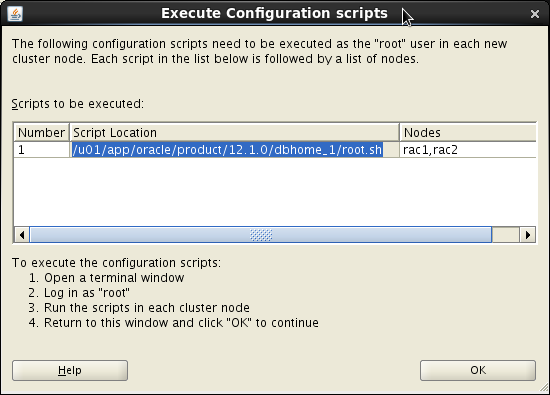
# /u01/app/oracle/product/12.1.0/dbhome_1/root.sh
Performing root user operation for Oracle 12c
The following environment variables are set as:
  ORACLE_OWNER= oracle
  ORACLE_HOME=  /u01/app/oracle/product/12.1.0/dbhome_1
Enter the full pathname of the local bin directory: [/usr/local/bin]:
The contents of "dbhome" have not changed. No need to overwrite.
The contents of "oraenv" have not changed. No need to overwrite.
The contents of "coraenv" have not changed. No need to overwrite.
Entries will be added to the /etc/oratab file as needed by
Database Configuration Assistant when a database is created
Finished running generic part of root script.
Now product-specific root actions will be performed.
#
Press the “Close” button and the Oracle DB software is now installed! Optionally, you can take a snapshot at this point, see instructions below.
Install the Database
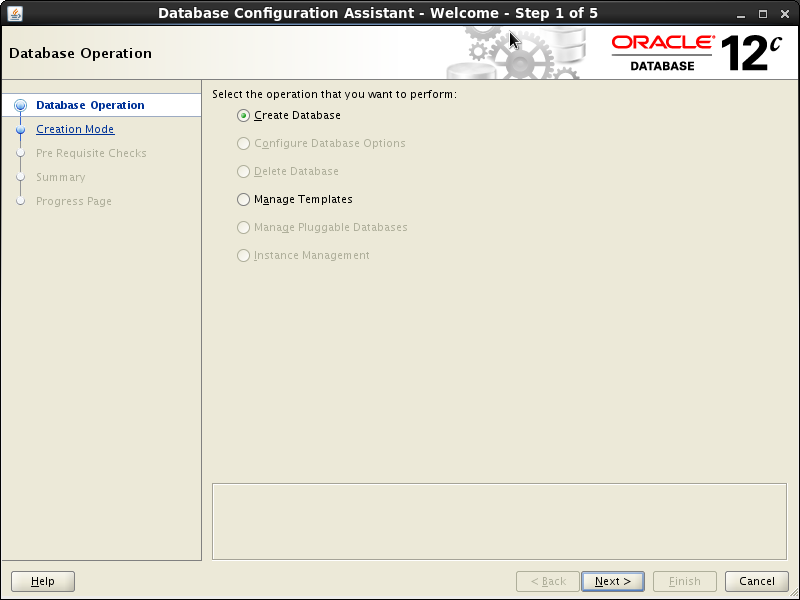
Start dbca – DB Configuration Assistant:
$ cd /u01/app/oracle/product/12.1.0/dbhome_1/bin
$ ./dbca
Accept “Create Database” option and press the “Next” button:
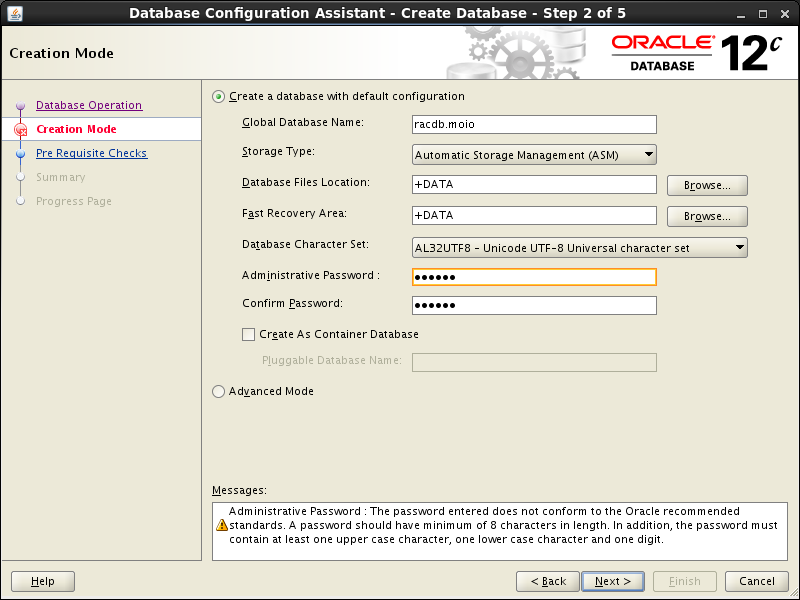
Check “Create a database with default configuration”; type in “Global Dtabase Name” the desired name; we have selected AL32UTF8 character set, make your choice as needed; also supply a password for SYS. We are going to create a reqular (pre-12c type) database, so the “Create As Container Database” checkbox is unchecked. Press the “Next” button to continue:
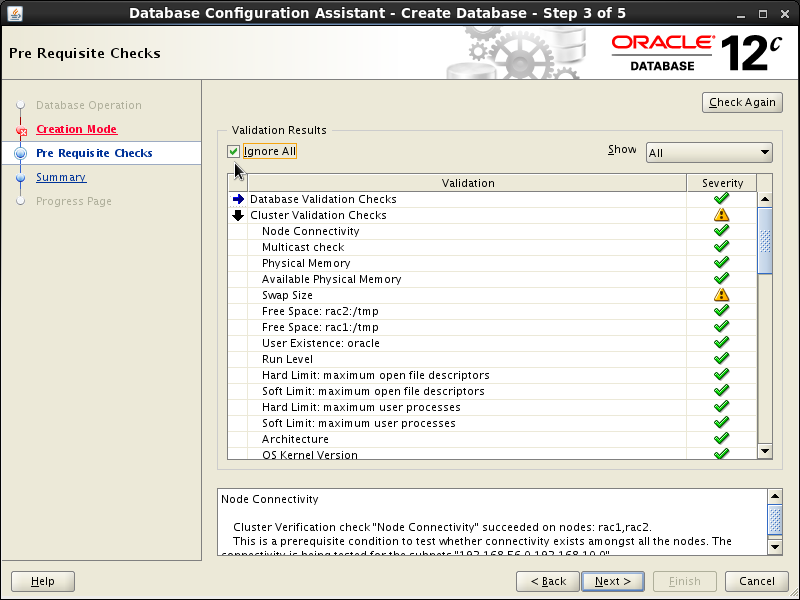
Wait for the prerequisite check to complete. The only reported problem was the familiar “Swap Size”. Check “Ignore All” checkbox and click the “Next” button.
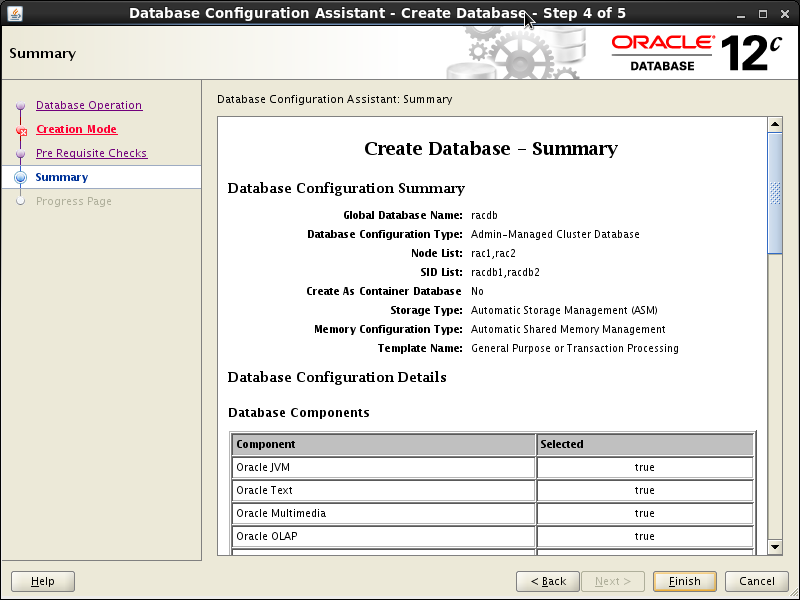
Press “Finish” button in the Summary screen:
Click the “Close” button to exit the installer.
The RAC database creation is now complete! See “How to check the Oracle RAC status” to make sure all went fine.
Connecting clients
From the public network
In this setup it is assumed that clients are in the “public” network, and that they also have RAC names in their /etc/hosts file (see above).
Under those assumptions, you can connect to the database via the Service Name, for example in sqlplus:
sqlplus64 SYS/spacewalk@//rac-scan.moio:1521/susemanager AS SYSDBA
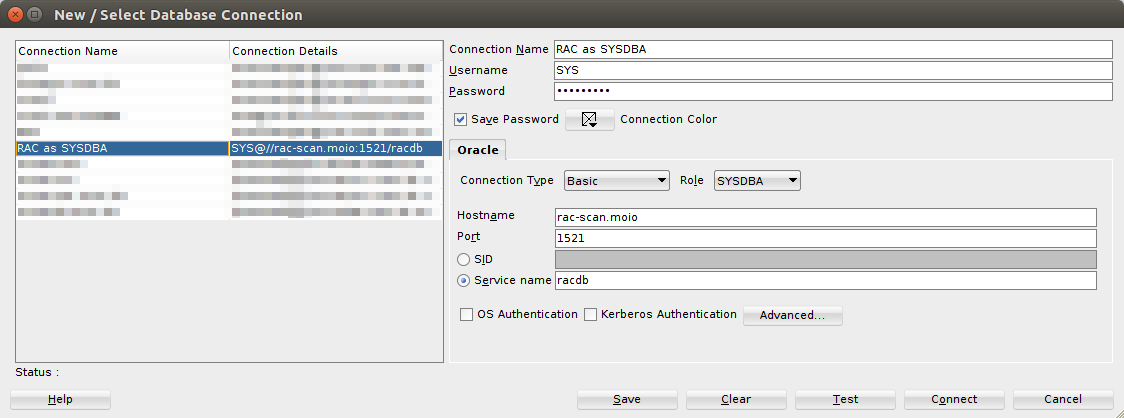
Or, in SQLDeveloper:
From an external host
The approach above works fine if your client is another virtual machine on the same libvirt host, but might be a limit in other cases (eg. if you need to access the client from a remote host).
A quick way around this limitation is to change some iptables rules on the libvirt host to allow traffic to the public network from other hosts, and adjust routing tables accordingly. Since libvirt simply uses iptables rules to implement NAT, it is possible to use the host as a “router” instead of a “gateway”. We will assume you need to connect to the RAC DB from an external host (that is able to reach the libvirt host) from now on.
First of all, make sure all interested machines have all RAC names in /etc/hosts (see above). That includes the RAC nodes themselves, the libvirt host and the client host.
Second, allow traffic from and to the public network through the libvirt host:
# run this as root on the libvirt host
export HOST_INTERFACE=br0
export HOST_NETWORK=192.168.188.0/24
export PUBNET_INTERFACE=virbr1
iptables -I FORWARD -d 192.168.56.0/24 -o $PUBNET_INTERFACE -j ACCEPT
iptables -I FORWARD -s 192.168.56.0/24 -i $PUBNET_INTERFACE -j ACCEPT
iptables -I FORWARD -i $PUBNET_INTERFACE -o $PUBNET_INTERFACE -j ACCEPT
Third, adjust the client host’s routing table to send traffic to the RAC through the libvirt host”
# run this as root on the client host
export LIBVIRT_HOST=dell.moio
sudo route add -net 192.168.56.0 netmask 255.255.255.0 gw $LIBVIRT_HOST
Finally, adjust rac1 and rac2‘s routing tables to send traffic to the client network through the libvirt host:
# run this as root on rac1 and rac2
export LIBVIRT_HOST_IP=192.168.56.1 # dell.moio
export CLIENT_NETWORK=192.168.188.0
export CLIENT_NETWORK_MASK=24
route add -net $CLIENT_NETWORK netmask 255.255.255.0 gw $LIBVIRT_HOST_IP
echo "$CLIENT_NETWORK/$CLIENT_NETWORK_MASK via $LIBVIRT_HOST_IP dev eth0" >/etc/sysconfig/network-scripts/route-eth0
You should now be able to connect to the RAC via the SCAN address.
How to check the Oracle RAC status
First, check that the ASM disk is available. Log into rac1 and then rac2 and issue the following command.
$ su
# oracleasm listdisks
DISK1
#
Second, check that the Grid Infrastructure is running correctly. On rac1 as root user:
$ su
# . oraenv
ORACLE_SID = [oracle] ? +ASM1
The Oracle base has been set to /u01/app/oracle
# crsctl status resource -t
--------------------------------------------------------------------------------
Name           Target  State        Server                   State details
--------------------------------------------------------------------------------
Local Resources
--------------------------------------------------------------------------------
ora.DATA.dg
             ONLINE  ONLINE       rac1                     STABLE
             ONLINE  ONLINE       rac2                     STABLE
ora.LISTENER.lsnr
             ONLINE  ONLINE       rac1                     STABLE
             ONLINE  ONLINE       rac2                     STABLE
ora.asm
             ONLINE  ONLINE       rac1                     Started,STABLE
             ONLINE  ONLINE       rac2                     Started,STABLE
ora.net1.network
             ONLINE  ONLINE       rac1                     STABLE
             ONLINE  ONLINE       rac2                     STABLE
ora.ons
             ONLINE  ONLINE       rac1                     STABLE
             ONLINE  ONLINE       rac2                     STABLE
--------------------------------------------------------------------------------
Cluster Resources
--------------------------------------------------------------------------------
ora.LISTENER_SCAN1.lsnr
    1        ONLINE  ONLINE       rac2                     STABLE
ora.LISTENER_SCAN2.lsnr
    1        ONLINE  ONLINE       rac1                     STABLE
ora.LISTENER_SCAN3.lsnr
    1        ONLINE  ONLINE       rac1                     STABLE
ora.cvu
    1        ONLINE  ONLINE       rac1                     STABLE
ora.oc4j
    1        OFFLINE OFFLINE                               STABLE
ora.rac1.vip
    1        ONLINE  ONLINE       rac1                     STABLE
ora.rac2.vip
    1        ONLINE  ONLINE       rac2                     STABLE
ora.scan1.vip
    1        ONLINE  ONLINE       rac2                     STABLE
ora.scan2.vip
    1        ONLINE  ONLINE       rac1                     STABLE
ora.scan3.vip
    1        ONLINE  ONLINE       rac1                     STABLE
--------------------------------------------------------------------------------
#
The same command can be run on rac2 by specifying +ASM2 to oraenv.
You should see various components running on both nodes. If there were serious problems during installation, the components wouldn’t start. Also you can check the alert file /u01/app/12.1.0/grid_1/log/rac1/alertrac1.log (on rac1 node, make adjustments for rac2). Note that the following error might just mean services are not finished starting yet:
CRS-4535: Cannot communicate with Cluster Ready Services
CRS-4000: Command Status failed, or completed with errors.
If you see those right after a VM startup, allow some minutes and try again.
Third, check that the database instance is running well. The srvctl utility, for example, shows the current configuration and status of the RAC database.
$ . oraenv
ORACLE_SID = [oracle] ? racdb
The Oracle base has been set to /u01/app/oracle
$ srvctl config database -d racdb
Database unique name: racdb
Database name: racdb
Oracle home: /u01/app/oracle/product/12.1.0/dbhome_1
Oracle user: oracle
Spfile: +DATA/racdb/spfileracdb.ora
Password file: +DATA/racdb/orapwracdb
Domain: moio
Start options: open
Stop options: immediate
Database role: PRIMARY
Management policy: AUTOMATIC
Server pools: racdb
Database instances: racdb1,racdb2
Disk Groups: DATA
Mount point paths:
Services:
Type: RAC
Start concurrency:
Stop concurrency:
Database is administrator managed
$ srvctl status database -d racdb
Instance racdb1 is running on node rac1
Instance racdb2 is running on node rac2
$
The V$ACTIVE_INSTANCES view can also display the current status of the instances.
$ export ORACLE_SID=racdb1
[oracle@rac1 Desktop]$ sqlplus / as sysdba
SQL*Plus: Release 12.1.0.2.0 Production on Mon Jun 20 16:55:53 2016
Copyright (c) 1982, 2014, Oracle.  All rights reserved.

Connected to:
Oracle Database 12c Enterprise Edition Release 12.1.0.2.0 - 64bit Production
With the Partitioning, Real Application Clusters, Automatic Storage Management, OLAP,
Advanced Analytics and Real Application Testing options
SQL> SELECT inst_name FROM v$active_instances;
INST_NAME
--------------------------------------------------------------------------------
rac1.moio:racdb1
rac2.moio:racdb2
exit
Disconnected from Oracle Database 12c Enterprise Edition Release 12.1.0.2.0 - 64bit Production
With the Partitioning, Real Application Clusters, Automatic Storage Management, OLAP,
Advanced Analytics and Real Application Testing options
$
How to Shut down Oracle RAC cleanly
We need to shutdown servers in nice and clean manner because we want save them in a robust state. Shutdown the database first by issuing the following commands on any node:
# su oracle
$ . oraenv
ORACLE_SID = [oracle] ? racdb
The Oracle base has been set to /u01/app/oracle
$ srvctl stop database -d racdb
$
Shutdown the Grid Infrastructure on rac1. As root user execute:
$ su
# . oraenv
ORACLE_SID = [racdb1] ? +ASM1
The Oracle base remains unchanged with value /u01/app/oracle
# crsctl stop crs
...
CRS-4133: Oracle High Availability Services has been stopped.
#
Shutdown the Grid Infrastructure on rac2. As root user execute:
$ su
# . oraenv
ORACLE_SID = [racdb1] ? +ASM2
The Oracle base remains unchanged with value /u01/app/oracle
# crsctl stop crs
...
CRS-4133: Oracle High Availability Services has been stopped.
#
Then shutdown both virtual machines.
How to start Oracle RAC up
Start the VMs one by one. On the libvirt host:
virsh start rac1 # wait for rac1 to be online
virsh start rac2
The Grid Infrastructure services should start automatically. You will need to bring up the database. Log into rac1 as the oracle user and execute:
# su oracle
$ . oraenv
ORACLE_SID = [oracle] ? racdb
The Oracle base has been set to /u01/app/oracle
$ srvctl start database -d racdb
$
The RAC database should be up and running!
Saving Virtual Machine Snapshots
Because the ASM disk is not in the qcow2 format, we cannot make use of libvirt snapshots out-of-the box. The following commands illustrate how to temporarily detach the ASM disk from the virtual machine, backing it up manually, taking a snapshot and restoring the original configuration afterwards.
# follow instructions in "How to Shut down Oracle RAC cleanly" first
# shutdown VMs
virsh shutdown rac1
virsh shutdown rac2
# detach ASM disk. Being a raw device it has to be backed up separately
virsh detach-disk rac1 /var/lib/libvirt/images/default/oracle-shared.img --config
virsh detach-disk rac2 /var/lib/libvirt/images/default/oracle-shared.img --config
cp /var/lib/libvirt/images/default/oracle-shared.img /var/lib/libvirt/images/default/oracle-shared.img.backup
# create a snapshot of the main disks
virsh snapshot-create rac1
virsh snapshot-create rac2
# take note of snapshot IDs, will be needed for restore
# reattach the ASM disk and start the VMs
virsh attach-disk rac1 /var/lib/libvirt/images/default/oracle-shared.img vdb --driver qemu --subdriver raw --mode shareable --config
virsh attach-disk rac2 /var/lib/libvirt/images/default/oracle-shared.img vdb --driver qemu --subdriver raw --mode shareable --config
virsh start rac1
virsh start rac2
Restoring Virtual Machine Snapshots
The following commands allow you to restore from a backup taken with commands from the previous section.
# shutdown VM
virsh shutdown oracle
# detach ASM disk. Being a raw device it has to be backed up separately
virsh detach-disk oracle /var/lib/libvirt/images/default/oracle-shared.img --config
cp /var/lib/libvirt/images/default/oracle-shared.img.backup /var/lib/libvirt/images/default/oracle-shared.img
# create a snapshot of the main disk
virsh snapshot-revert oracle <SNAPSHOT ID>
# reattach the ASM disk and start the VM
virsh attach-disk oracle /var/lib/libvirt/images/default/oracle-shared.img vdb --driver qemu --subdriver raw --mode shareable --config
virsh start oracle
4 Commenti
Hi,
some pictures missing right above the “Guest Operating System Installation” part.
Good catch, fixed now, thanks!
Excellent manual, thank you
Hey Silvio Wonderful tutorial !!
The only thing I changed was OVM VM’s (vmrac1 & 2) instead of ‘libvirt’ VM’s.
Many thanks Silvio , for this clearly written “step-by-step” !!
Yves
sys-db-services@telenet.be